Designing Loox Pocket PC - PART 2
20
Aug'10
 Cpotorac
Member since:
Aug 2010
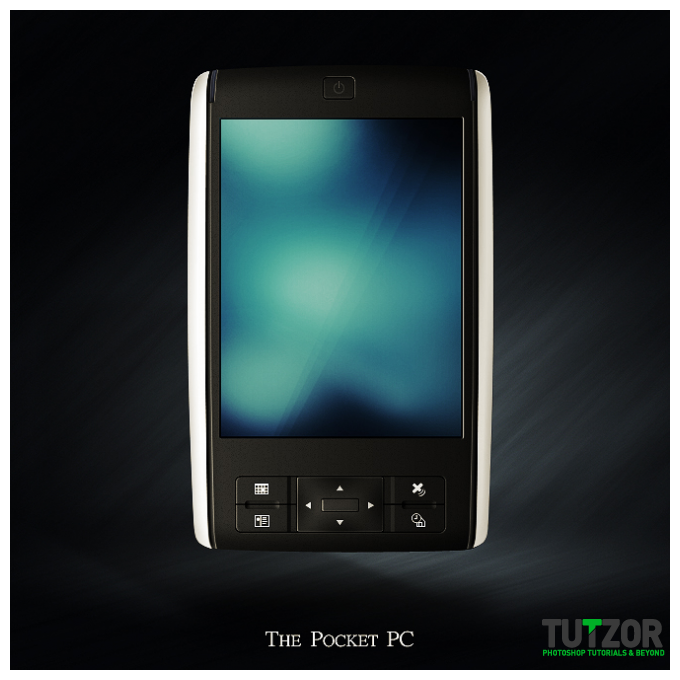
I have prepared for you a nice tutorial that will show you guys how to create an interesting Pocket PC using only Photoshop.
Final Image
Step
26
 Cpotorac
Member since:
Aug 2010
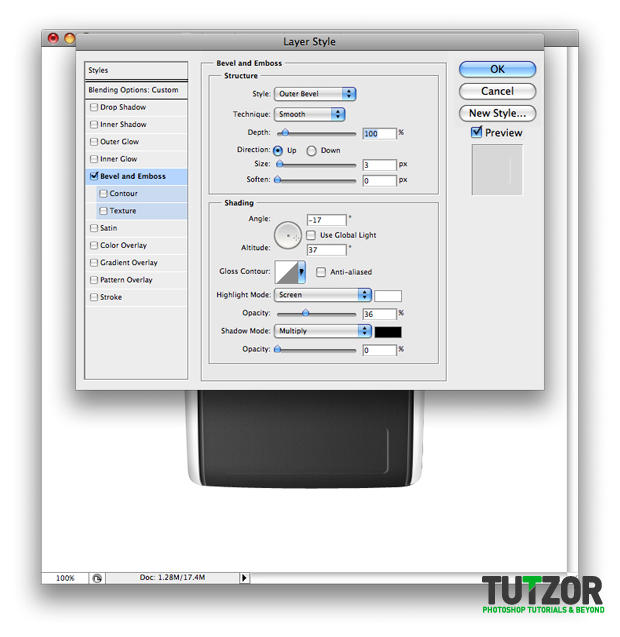
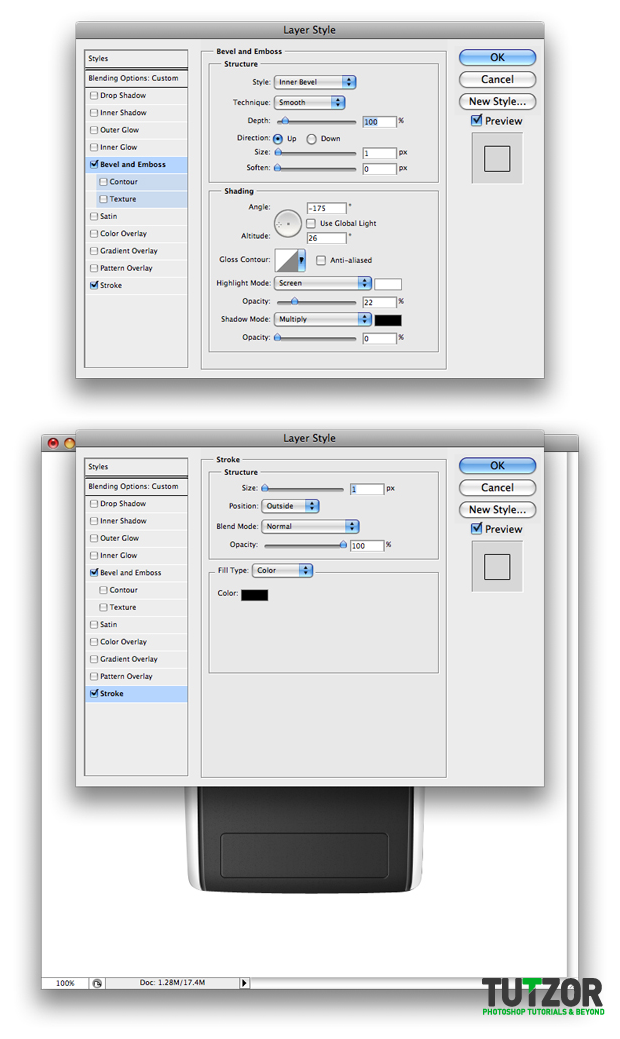
Now set the Fill to 0% and use these settings for the Blending Options:

Step
27
 Cpotorac
Member since:
Aug 2010
Now duplicate the layer and change the Blending Options with these:

Step
28
 Cpotorac
Member since:
Aug 2010
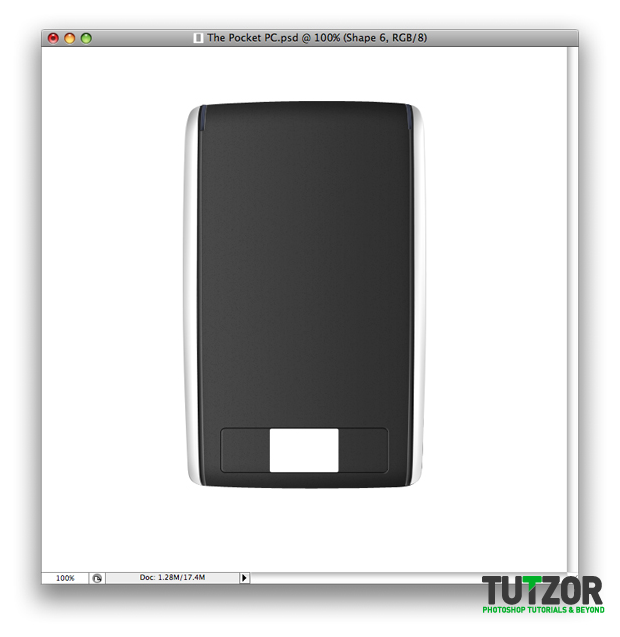
Make another shape as I did using the same tool.

Step
29
 Cpotorac
Member since:
Aug 2010
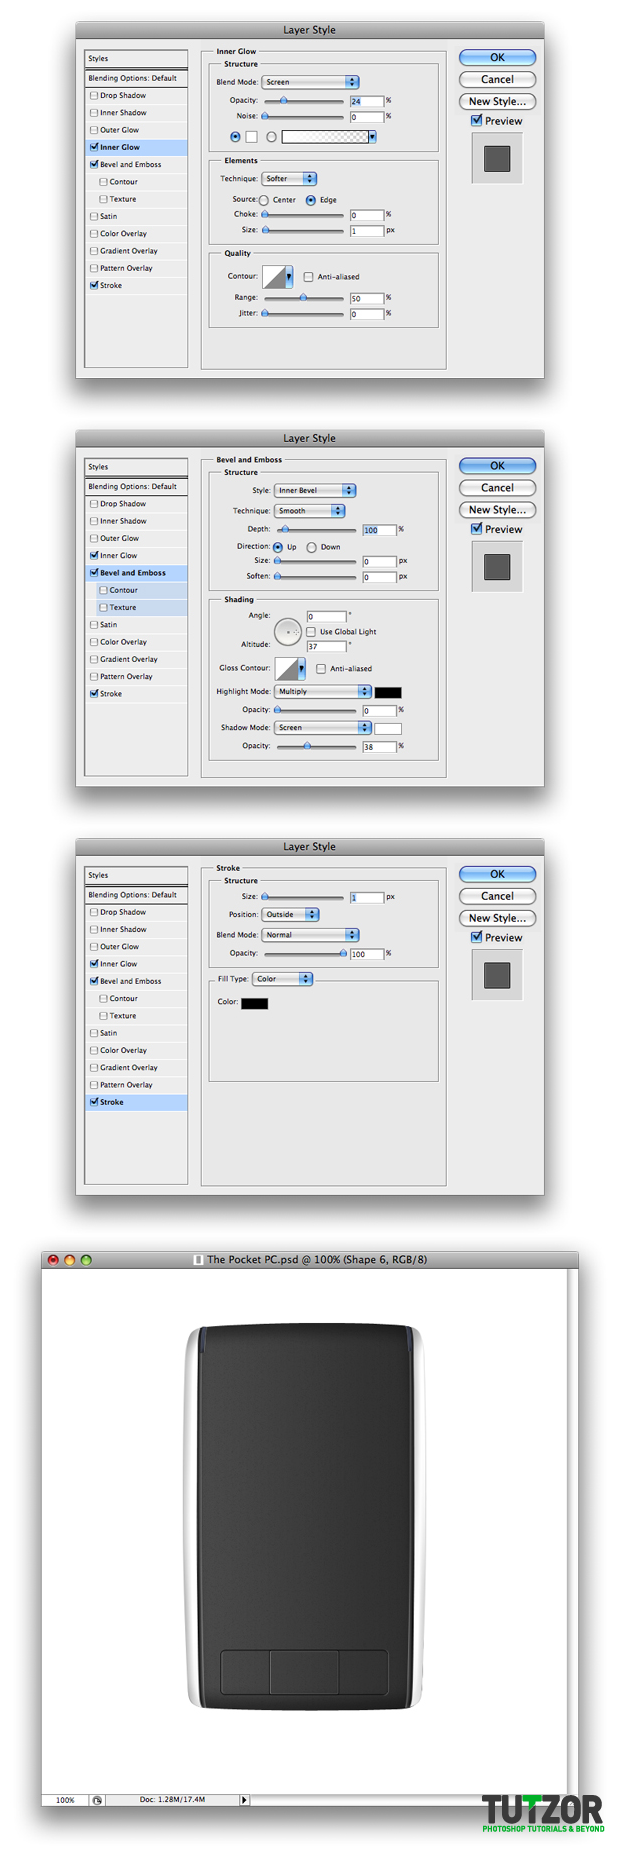
Same as with the shape on Step 26, set the Fill to 0% and use these Blending Option settings:

Step
30
 Cpotorac
Member since:
Aug 2010
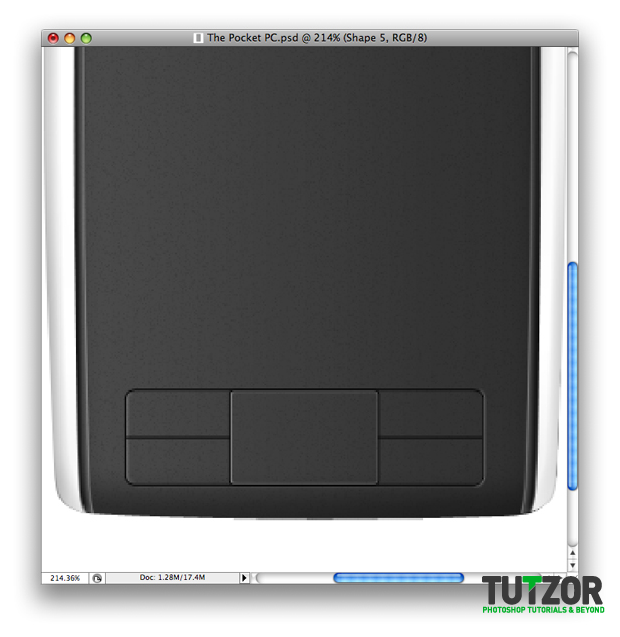
Using the Line Tool make 2 (1px) strips in the center of the button from left to right as I did:

Step
31
 Cpotorac
Member since:
Aug 2010
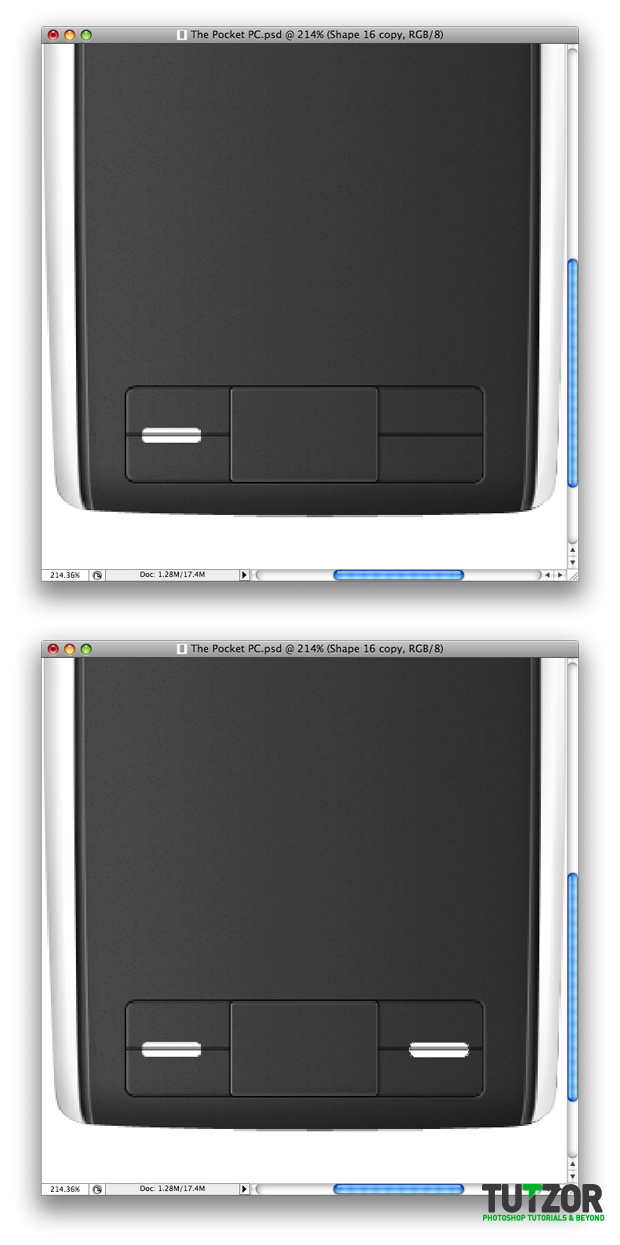
Make a shape as I did again using the Rounded Rectangle Tool, than duplicate it and move it to the other side.

Step
32
 Cpotorac
Member since:
Aug 2010
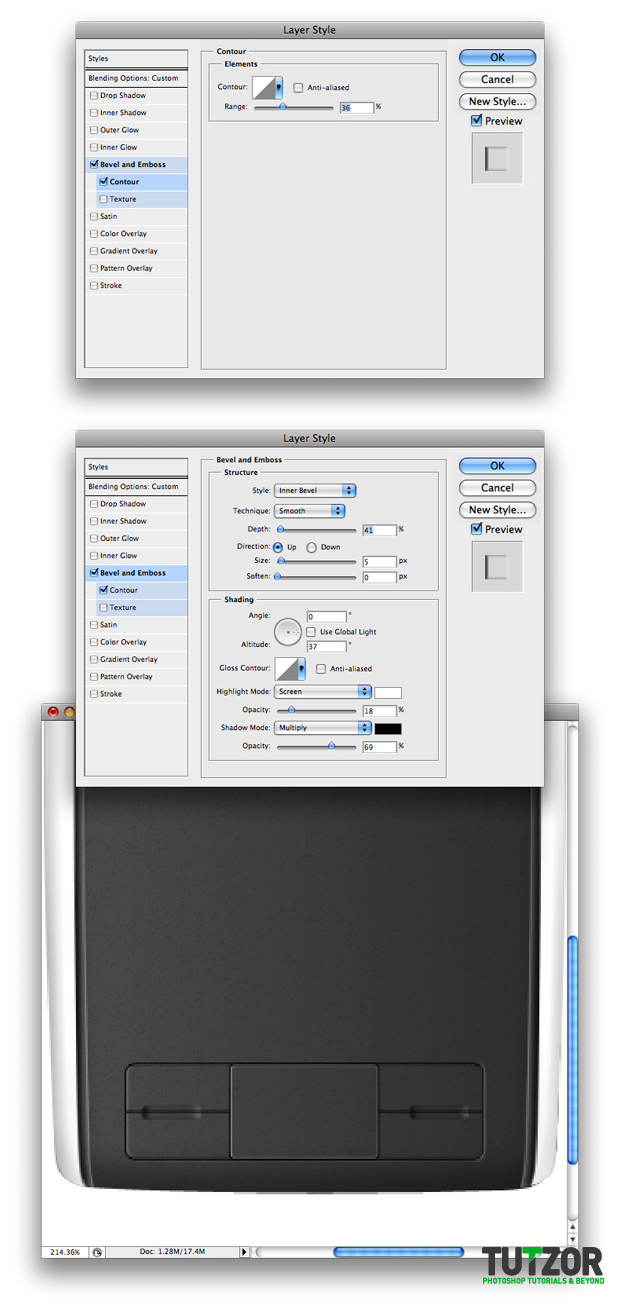
Set the Fill to 0% for both, and then set the Blending Options as I did for both.

Step
33
 Cpotorac
Member since:
Aug 2010
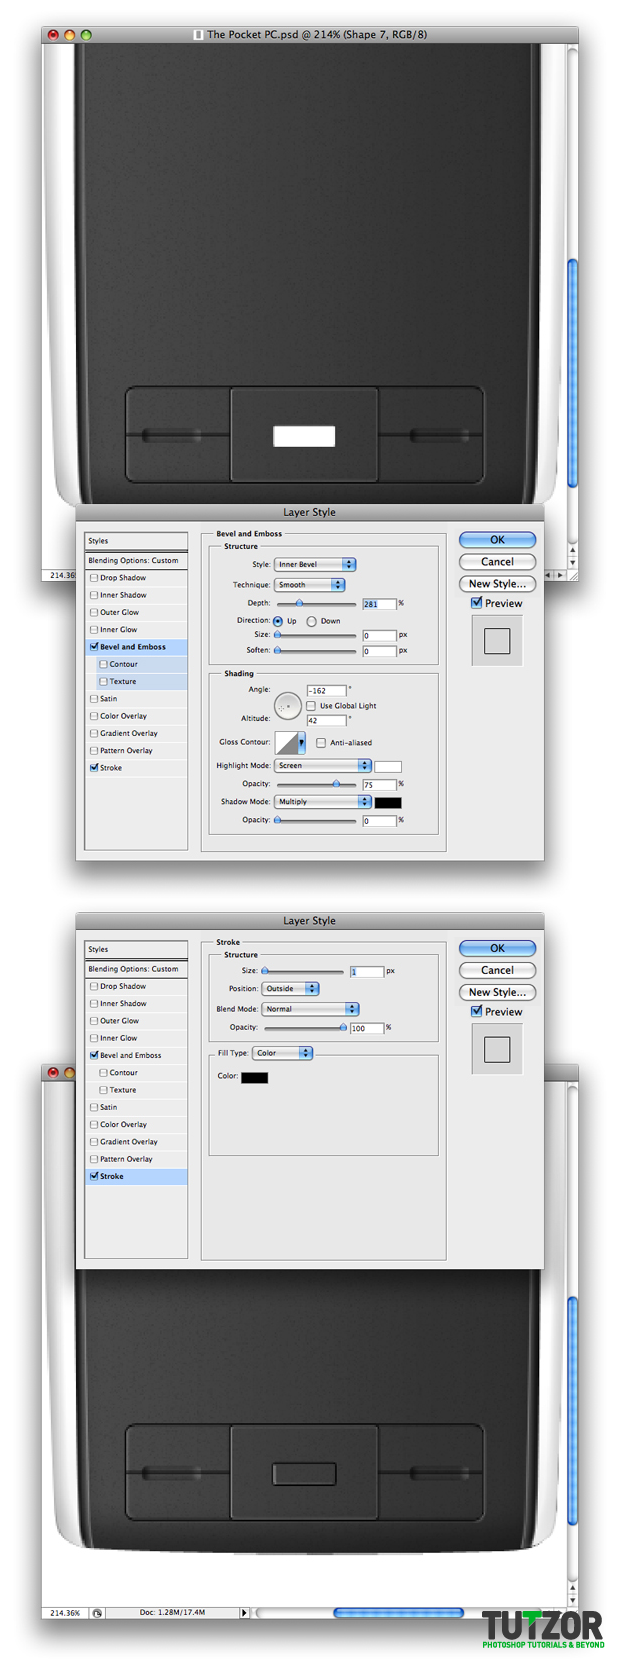
Make another shape as I did. Also set it to Fill 0% and BLending Options as I did:

Step
34
 Cpotorac
Member since:
Aug 2010
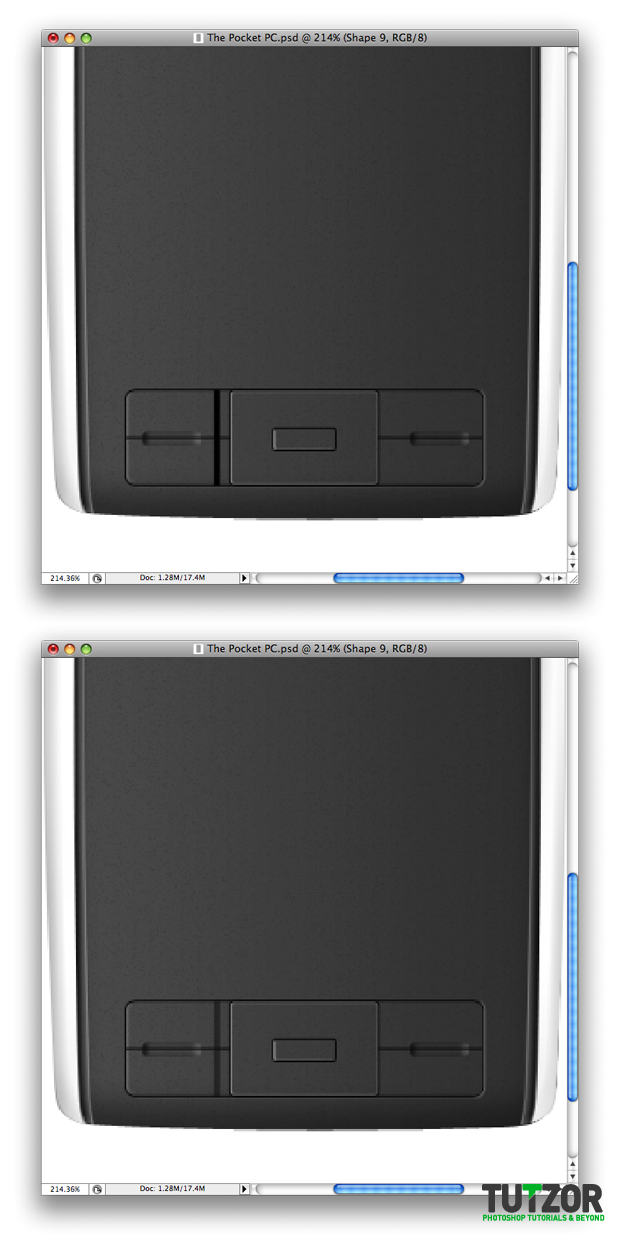
Make another shape as I did. This time use the Rectangle Tool and a Black color. Set it to 50% Opacity.

Step
35
 Cpotorac
Member since:
Aug 2010
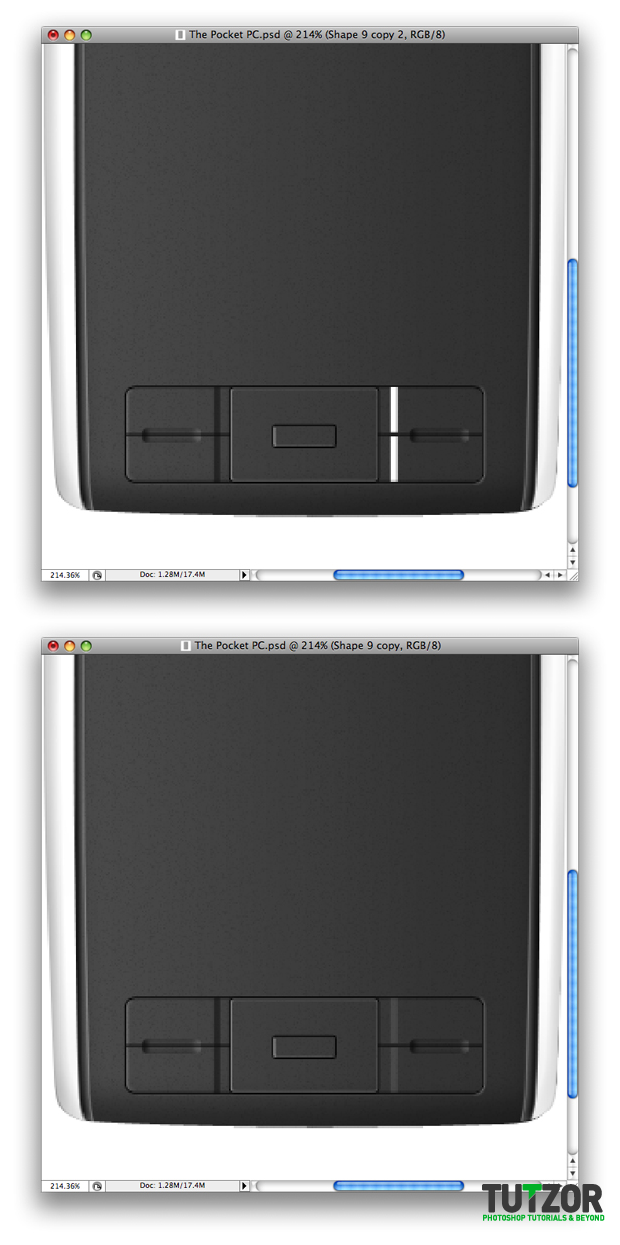
In the other side make 2 White shapes as I did and also set the Opacity to 10%.

Step
36
 Cpotorac
Member since:
Aug 2010
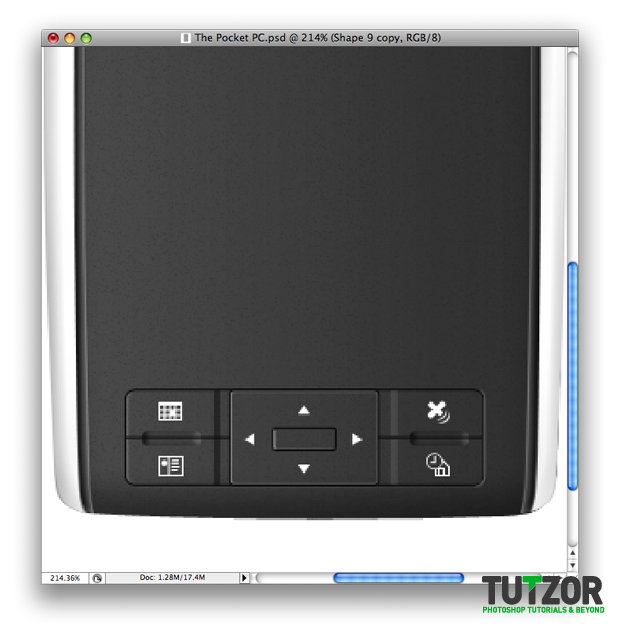
Next you need to draw on the buttons. I used the Line Tool to make the complicated ones and the Triangle from the Custom Shape Tool.

Step
37
 Cpotorac
Member since:
Aug 2010
Open up a new layer. Ctrl + Click on the middle button to make a selection.
Using the brush tool set to Black, Hardness 0% and Diameter to 90px, just click once as I did for each side. Last set the Opacity to 46%.


Step
38
 Cpotorac
Member since:
Aug 2010
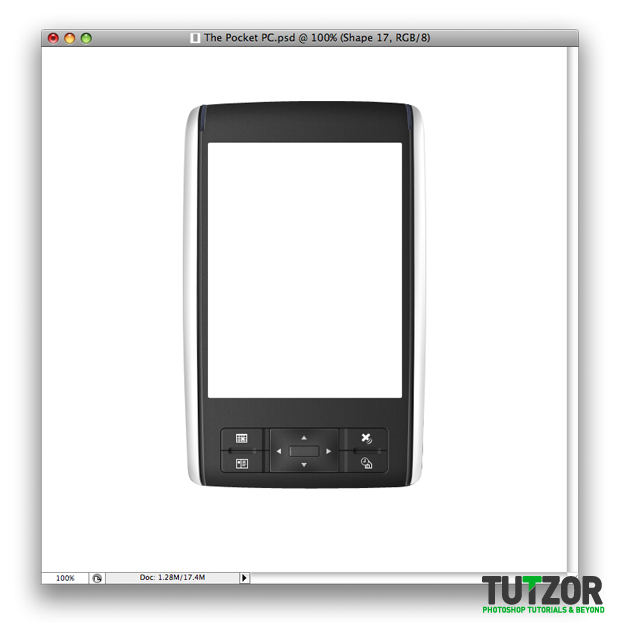
Making the Screen is next.
Make a shape as I did using the Rounded Rectangle Tool.

Step
39
 Cpotorac
Member since:
Aug 2010
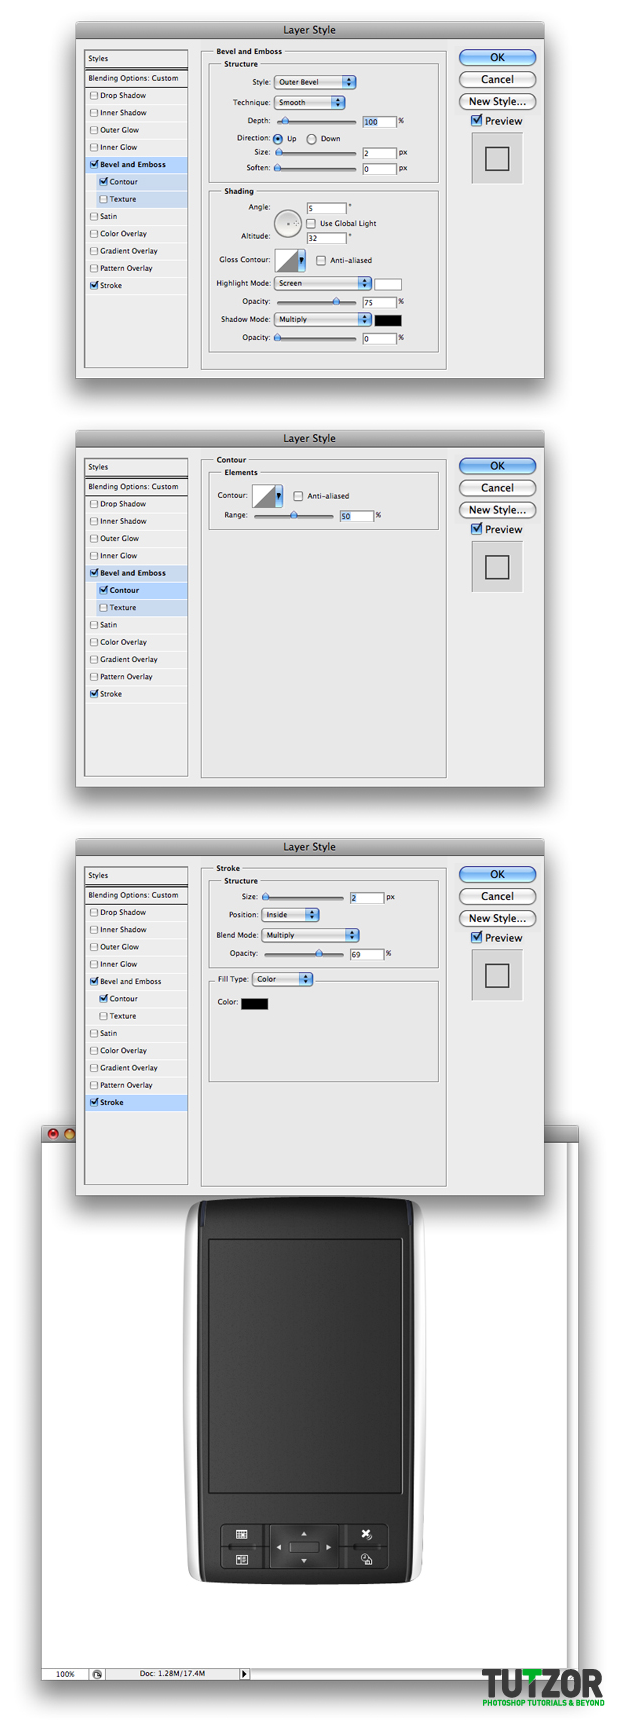
Set the Fill to 0% and the Blending Options as I did:

Step
40
 Cpotorac
Member since:
Aug 2010
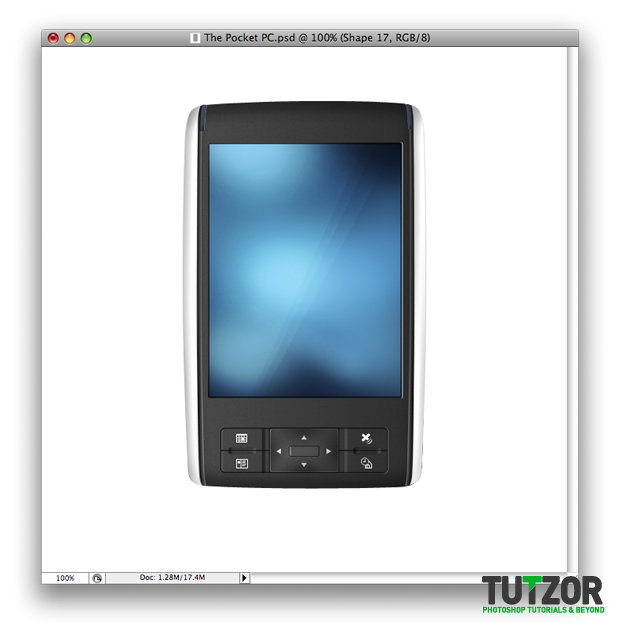
Use a nice image you can find on the internet or something you find interesting to use for the screen. I personally made this image that I will show you how to make in the next tutorial.

Step
41
 Cpotorac
Member since:
Aug 2010
Last is the upper button.
Make a shape as I did. Same as with the other buttons set Fill to 0% and use my settings.


Step
42
 Cpotorac
Member since:
Aug 2010
Duplicate the shape. Fill 0% and change my settings for the Blending Options as I did. Also draw the Shutdown sign using the Elliptical Tool and the Line Tool.


Step
43
 Cpotorac
Member since:
Aug 2010
Finalize your work with a very nice and interesting background.
Thank you for reading.
