Photoshop Tutorial: How to create an Ice effect on your text
26
Mar'12
 irenethompson80
Member since:
Feb 2012
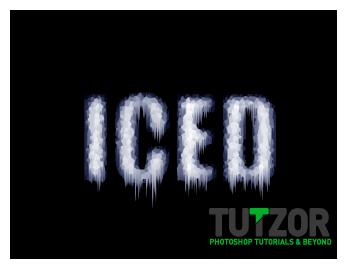
In this guide, we will discuss how you can turn your common type title text into Iced looking graphics. If your flyer printing title design or catalog cover needs something “cool” for its theme, then this might just be the right trick for you.
Final Image
Step
01
 irenethompson80
Member since:
Feb 2012
In this guide, we will discuss how you can turn your common type title text into Iced looking graphics. If your flyer printing title design or catalog cover needs something “cool” for its theme, then this might just be the right trick for you. Review and try out the steps below and you can create your own customized Iced looking text graphics in no time at all.
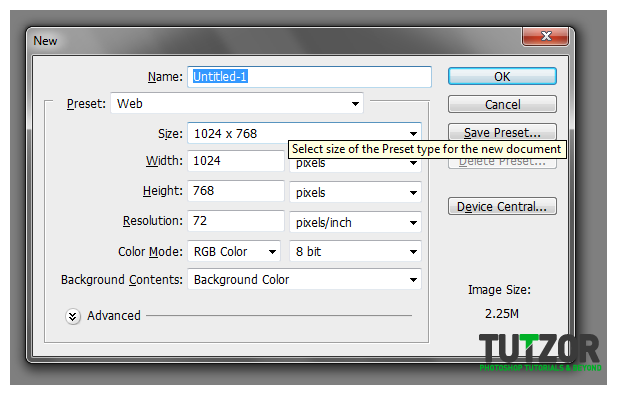
1. Starting off, create your new document in Adobe Photoshop as needed. Set the width and height dimensions depending on how large you want your text title to be. If you are printing this for mass production, it is recommended that you use a high 300ppi resolution value when creating your new document as this gives the best quality for printing. Use 72ppi for web designs and computer graphics.

Step
02
 irenethompson80
Member since:
Feb 2012
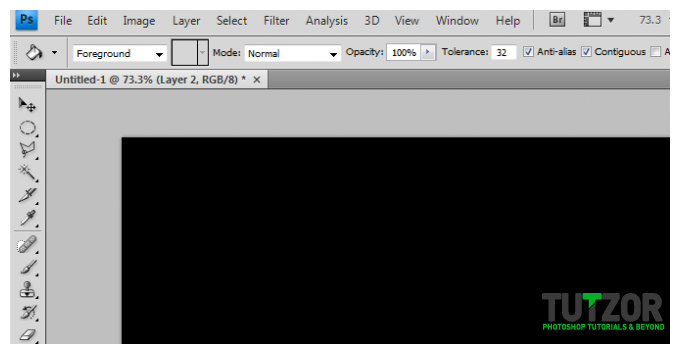
2. Now, in your new document, setup the background as you need it. For our example, we will be using black as a background just so you can see the effects we are doing.

Step
03
 irenethompson80
Member since:
Feb 2012
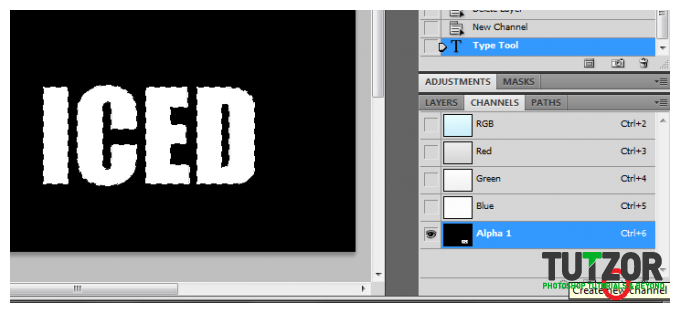
3. Now, with the background setup, we are going to create a new channel. Just go to the channels panel (usually beside the paths and the layers channel) and then click on the button below to create a new channel (you should get ALPHA 1). Then, using the text tool, just type in the text that you want. Make sure you use very thick type font styles to make a more convincing icy type text. Use a white color for our text for now.

Step
04
 irenethompson80
Member since:
Feb 2012
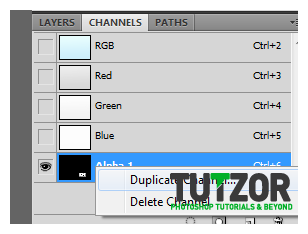
4. Next, duplicate the channel by right clicking on it and then selecting duplicate channel.

Step
05
 irenethompson80
Member since:
Feb 2012
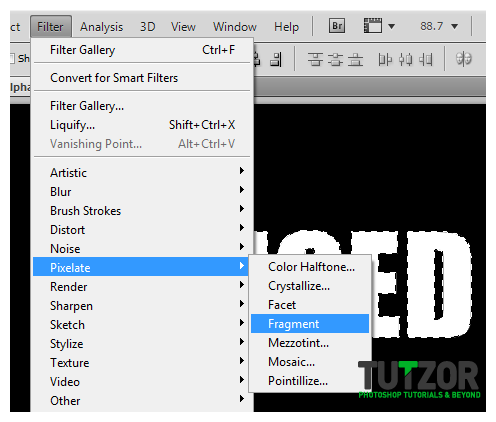
5. With the duplicate channel selected, go to Filter -> Pixelate -> Fragment to apply this filter. Afterwards, press CTRL+F three times to repeat the process and get a more pixelated shape in this layer.

Step
06
 irenethompson80
Member since:
Feb 2012
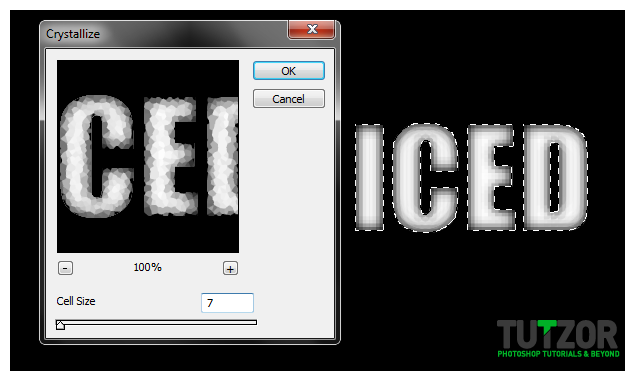
6. Then, go to Filters -> Pixelate -> Crystalize. In the window that appears, add a 7-20 value depending on the size of the text you are working with. Make sure that we get some nice edgy shapes in our text element. Just adjust it to your preference.

Step
07
 irenethompson80
Member since:
Feb 2012
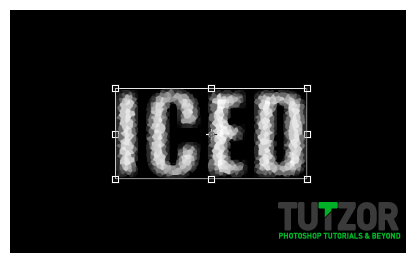
7. Once done, select this layer we have and go to Select -> All (or press CTRL+A). Then, go to Edit -> Copy or press CTRL+C. Afterwards, go to the LAYER panel. Create a new layer by pressing CTRL+SHIFT+N. Then and go to EDIT-> Paste or press CTRL+V. This should transfer our shape as a layer.

Step
08
 irenethompson80
Member since:
Feb 2012
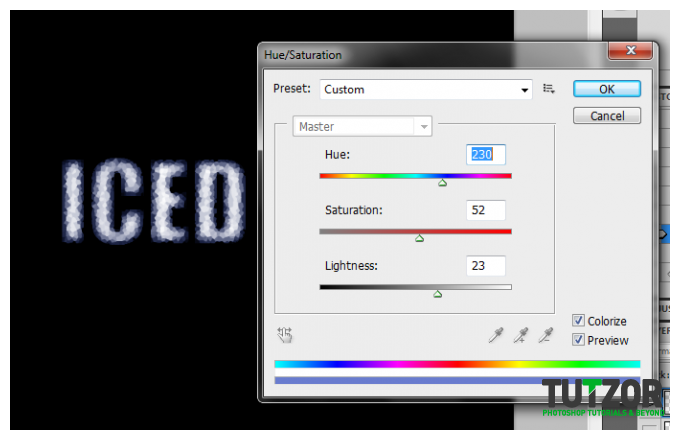
8. Now, we shall adjust the colors to get that blue icy effect. Go to Image -> Adjustments -> Hue and Saturation. Adjust the values accordingly:
a. Hue: 230
b. Saturation: 52
c. Lightness: 23

Step
09
 irenethompson80
Member since:
Feb 2012
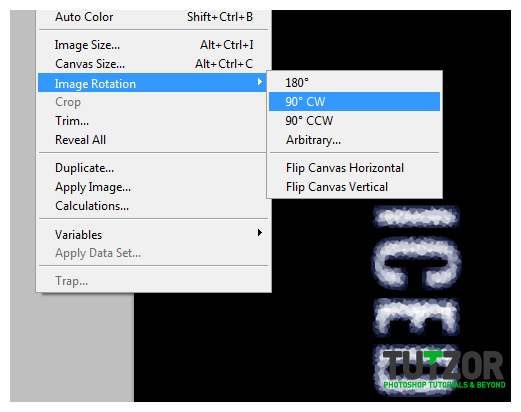
9. Next, go to Image -> Image Rotation -> 90CW. This will rotate our text 90 degrees clockwise.

Step
10
 irenethompson80
Member since:
Feb 2012
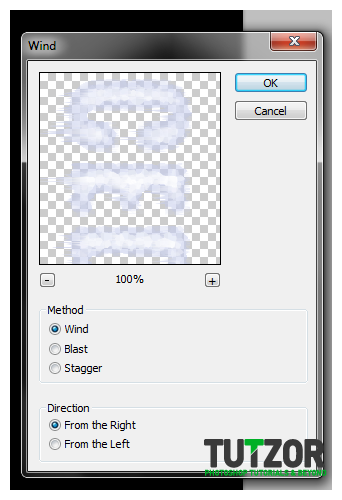
10. Now, we will add a wind effect to simulate some icy structures. Just go to Filter -> Stylize -> Wind. Use the WIND method and the direction from the right.

Step
11
 irenethompson80
Member since:
Feb 2012
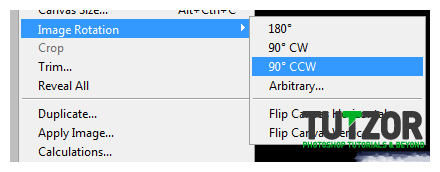
11. Then, rotate our text back to the original orientation by going to Image -> Image Rotation -> 90 CCW.

Step
12
 irenethompson80
Member since:
Feb 2012
12. Great! Now we have some great ICY elements already to our text.

Step
13
 irenethompson80
Member since:
Feb 2012
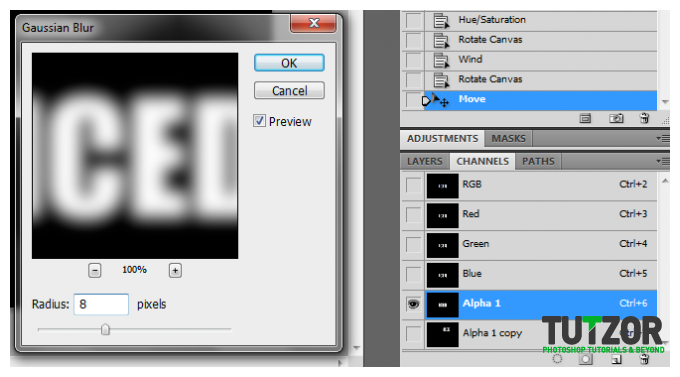
13. Now, go back to the channels panel and select our ORIGINAL channel. Go to Filter -> Blur -> Gaussian Blur and then use an 8 pixel value.

Step
14
 irenethompson80
Member since:
Feb 2012
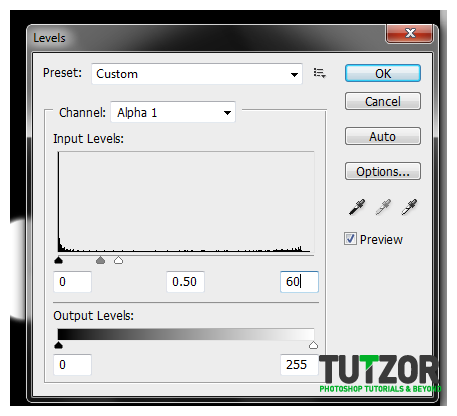
14. Afterward, go to Image -> Adjustment -> Levels and add the following value settings:
a. 0
b. 0.5
c. 60

Step
15
 irenethompson80
Member since:
Feb 2012
15. Then, hold down the CTRL key and click on the Alpha 1 Channel. This should select the area of the text with our new effects in.


Step
16
 irenethompson80
Member since:
Feb 2012
16. Good, now go back to the Layers panel. Now press D and X on your keyboard to reset the foreground and background colours. Then Press CTRL+SHIFT+N to create a new layer.


Step
17
 irenethompson80
Member since:
Feb 2012
17. With the new layer selected, go to Filter -> Render -> Clouds. Then afterwards, go to Filter -> Sketch -> Chrome. Use a value of 3 on the detail and a value of 3 on the smoothness.


Step
18
 irenethompson80
Member since:
Feb 2012
18. Next, double click on this new layer to access its layer styles. Click on the option for inner glow and then use these settings.
a. Opacity: 85
b. Color: Blue
c. Choke: 25
d. Size: 24
e. Leave the rest to default


Step
19
 irenethompson80
Member since:
Feb 2012
19. Afterwards, change the Blend mode of this layer to “Overlay” and reduce its opacity to 50%.


Step
20
 irenethompson80
Member since:
Feb 2012
20. Great! Now you have a very ICY type text for you to use. Just use the eraser tool to remove any odd connections that you do not want.


