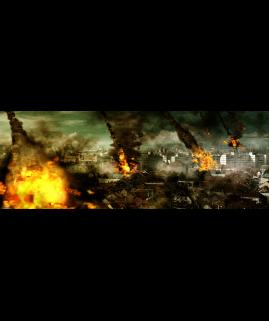
Stone “Aged” text effects using Adobe Photoshop
16
Mar'12
 irenethompson80
Member since:
Feb 2012
If you need some rock hard, stoned looking text for special title text and slogan text, this tutorial will help you do this specific effect for your magazine, booklet, catalog printing and flyer printing titles easily.
Final Image
Step
01
 irenethompson80
Member since:
Feb 2012
If you need some rock hard, stoned looking text for special title text and slogan text, Adobe Photoshop is your tool to create the needed effects. This tutorial will help you do this specific effect for your magazine, booklet, catalog printing and flyer printing titles easily. What is more, you do not need to be a Photoshop expert to do this. Simply follow the instructions below and you will get that stone “aged” text that you need.
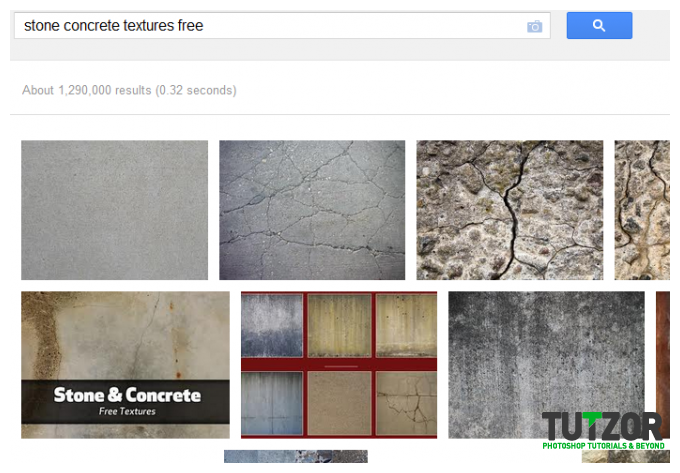
1. First, you will want to gather a key raw resource material. You will want to get your stone texture. Do this by just looking around over the Internet for stone textures. More particularly try stone, granite, sand and concrete textures. It all depends on the “look” that you are trying to establish. Make sure though that you find something that is fairly large (over 1000 pixels width and height) or something of high resolution to make the texture work properly.

Step
02
 irenethompson80
Member since:
Feb 2012
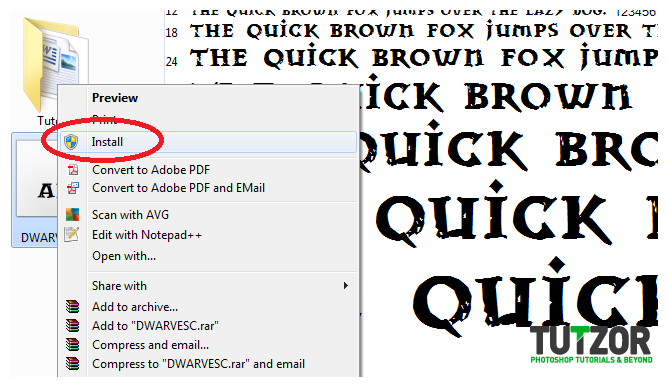
2. Secondly, try to get a font style that is appropriate for a stoned type effect. It might be good to use wide, fat font styles with chipped or cracked type features. Search for stone related fonts or even grunge fonts as they usually have these kinds of chopped or cracked effects. Download and install them into your system.

Step
03
 irenethompson80
Member since:
Feb 2012
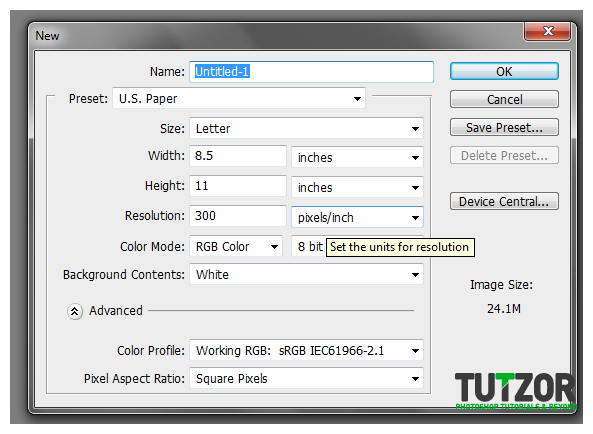
3. Next, we will now create our document. Since we will be using the text we are creating for print materials, it is important that you choose a high resolution for the print. A value of 300ppi or higher is recommended.

Step
04
 irenethompson80
Member since:
Feb 2012
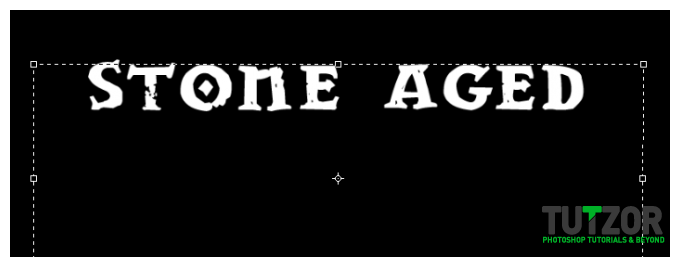
4. Once you have that new document, place the appropriate background for your text. In this example, we are using a black background. Once you have that black background just type in your title with white colored text using the font you just got.

Step
05
 irenethompson80
Member since:
Feb 2012
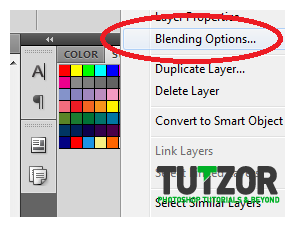
5. Then go to blending options by right clicking on the text layer and clicking “Blending Options”.

Step
06
 irenethompson80
Member since:
Feb 2012
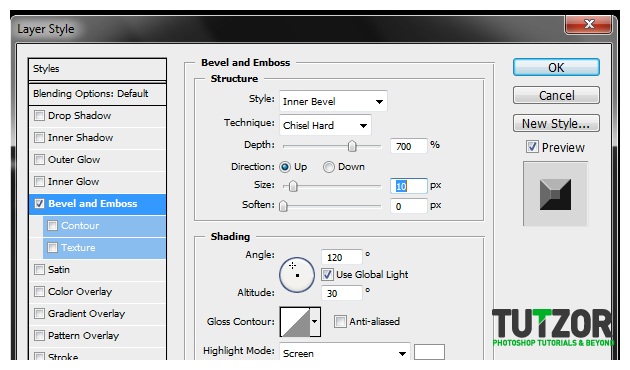
6. First, add a Bevel and Emboss blending option by ticking on its appropriate checkbox. Change the structure technique to Chisel hard. Increase the depth to around 700% (or as appropriate for your title). Use a 10 size value and put the soften value to 0.

Step
07
 irenethompson80
Member since:
Feb 2012
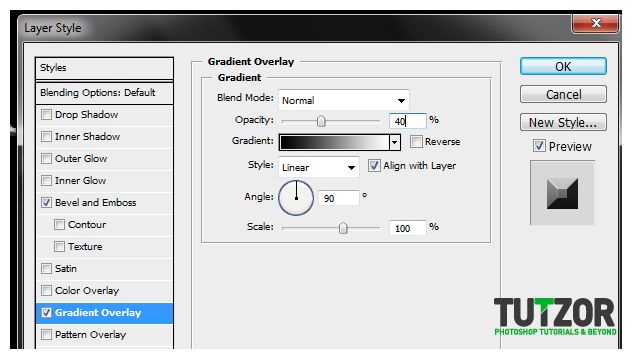
7. Add a gradient overlay too by ticking its checkbox. Use a white to black color gradient. Reduce the opacity here to around 30-40%.

Step
08
 irenethompson80
Member since:
Feb 2012
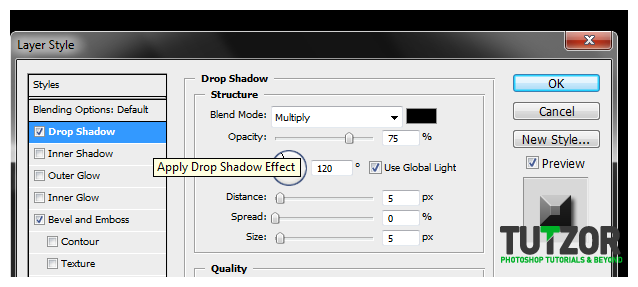
8. If you are going to use this on lighter backgrounds, you will also want to tick off the option for drop shadow.

Step
09
 irenethompson80
Member since:
Feb 2012
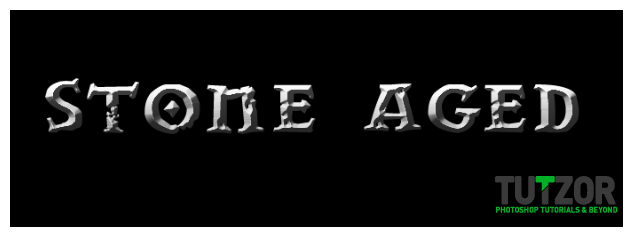
9. Great! Now we have the basic chiselled looking shape for our text.

Step
10
 irenethompson80
Member since:
Feb 2012
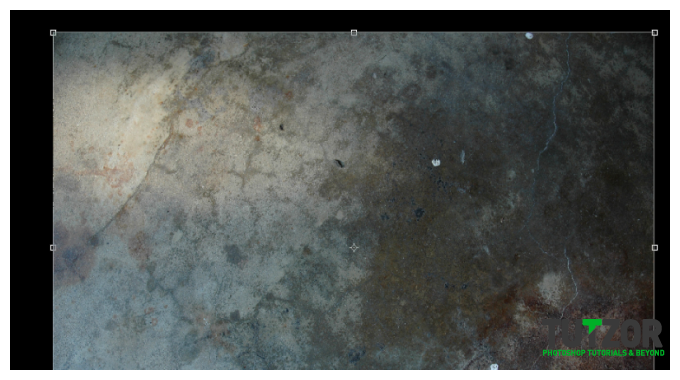
10. Next, we will add our texture. Simple copy and paste the texture into your canvass.

Step
11
 irenethompson80
Member since:
Feb 2012
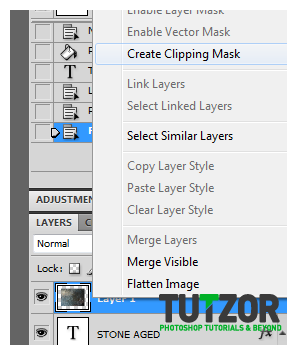
11. With this texture on top, right click on it on the layer view and click on the option “Create Clipping Mask”.

Step
12
 irenethompson80
Member since:
Feb 2012
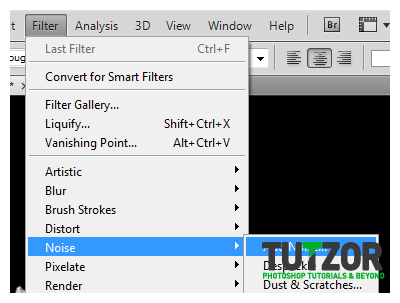
12. Finally, with the texture layer still selected go to Filter -> Noise -> Add Noise...

Step
13
 irenethompson80
Member since:
Feb 2012
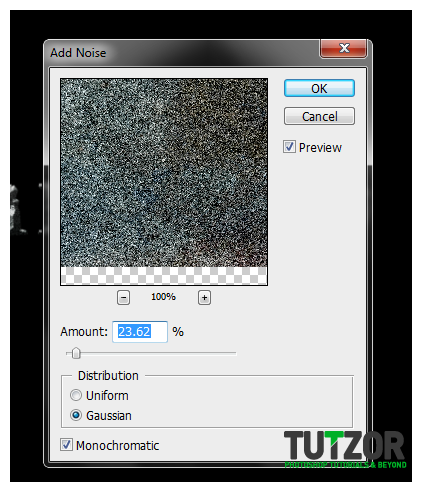
13. Add a 15%-30% value for the noise. Use the Gaussian style distribution and tick of the option for “Monochromatic”. Once done click on OK.

Step
14
 irenethompson80
Member since:
Feb 2012
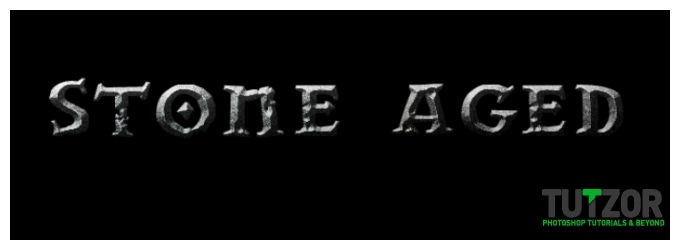
14. Once done you should have an Aged looking stone text that you can use for your specialized theme titles.

Step
15
 irenethompson80
Member since:
Feb 2012
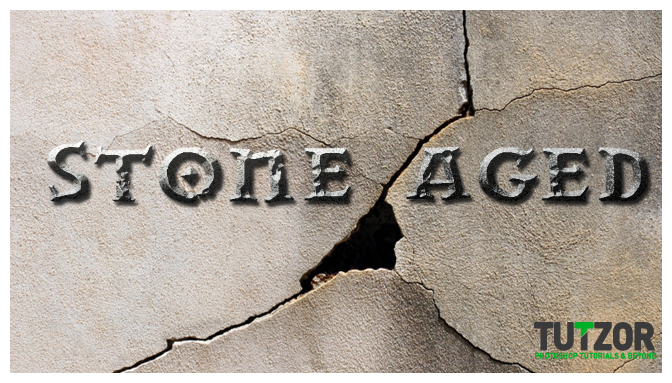
15. Experiment with different textures, backgrounds and font styles to get wonderful stone styled effects.

Step
16
 irenethompson80
Member since:
Feb 2012
Great! Now you know Stone Aged text effects using Adobe Photoshop. Congratulations.
Hope you enjoy the tutorial! Swing by PrintPlace Tutorials to find more of this.


