How to create an apocalyptic panoramic scene using Photoshop CS5 - PART 1
28
Oct'10
Member since:
Sep 2010
Today I'll show you all how to create a panorama using the algorithm of Photoshop CS5 and then for those who are advanced in photo manipulation I'll show you how to create an apocalyptic scene with fireballs and smoke.
You can use my images for this tutorial or you can take your own cool pictures. Don't forget to use a tripod and shoot a sequence of images for your desired place.
Also please donwload this image:
http://www.sxc.hu/browse.phtml?f=download&id=473937
Please download the zip file with the images and the brushes.
Hope you'll enjoy it.
Final Image

Step
01
Member since:
Sep 2010
For this tutorial I’m using my own images. You can make your own sequence of images and then do a panorama like I’m going to show you next. Here are my photos, I’ve used a tripod, you should do it to.


Step
02
Member since:
Sep 2010
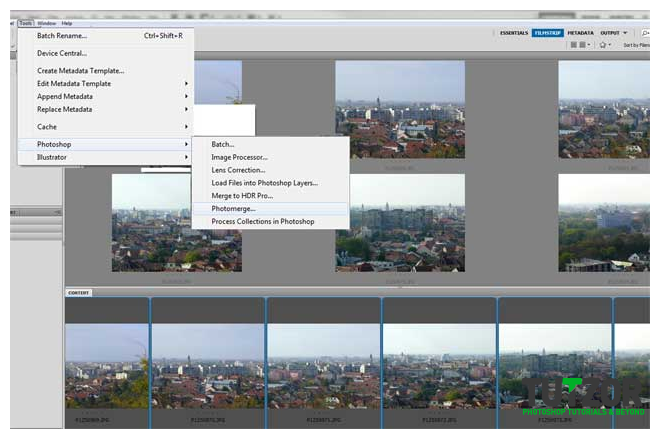
Now open Adobe bridge (In photoshop, File > Browse in bridge). Search for your images, select them and go to Tools > Photoshop > Photomerge.

Step
03
Member since:
Sep 2010
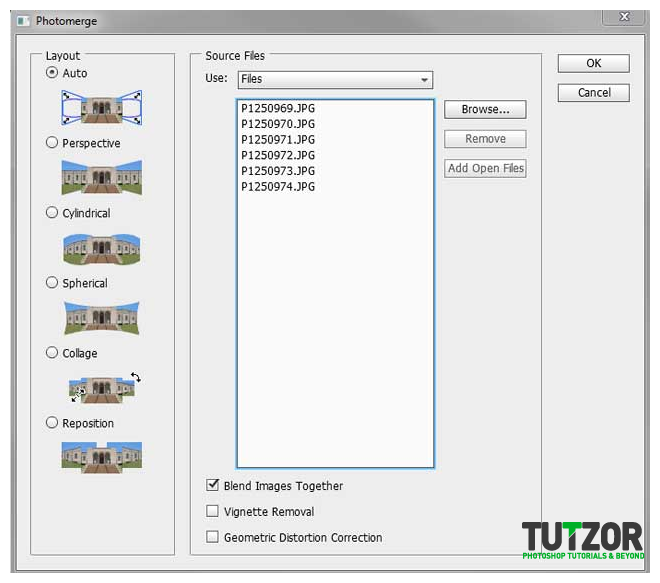
A new panel will open and use my settings: Check auto and blend images together.

Step
04
Member since:
Sep 2010
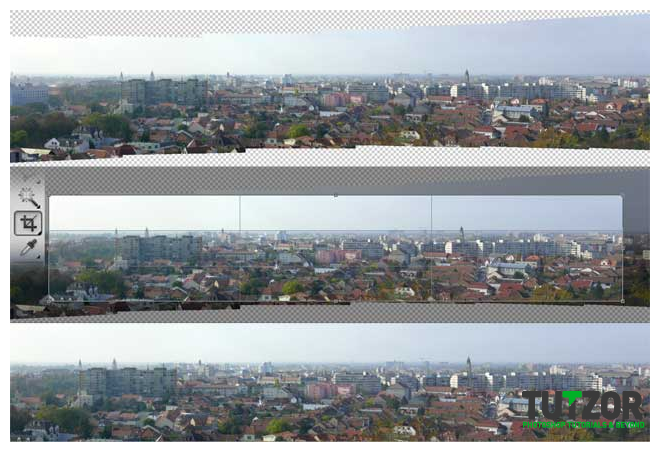
After photoshop ends the process you’ll have something like me. Now I’m going to use the crop tool because we need the edges straight and I don’t need all of this image. So select the crop too and make a selection like me.

Step
05
Member since:
Sep 2010
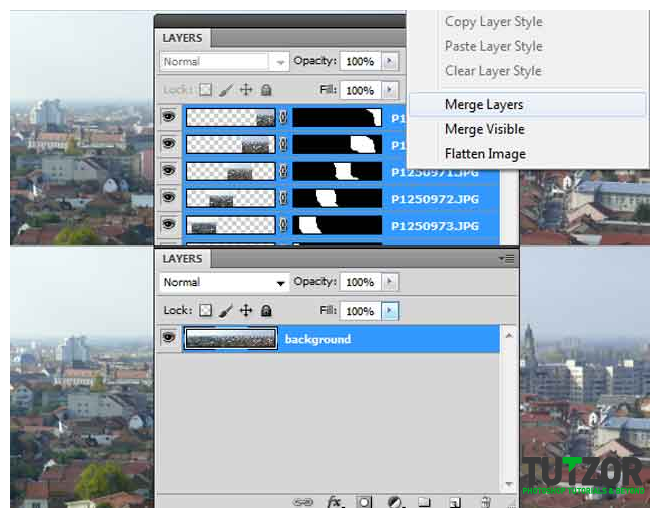
If you look in the layers windows you’ll see that this panorama algorithm uses layer mask. Merge this layers (select them > right click > merge layers) and rename the layer to “background”

Step
06
Member since:
Sep 2010
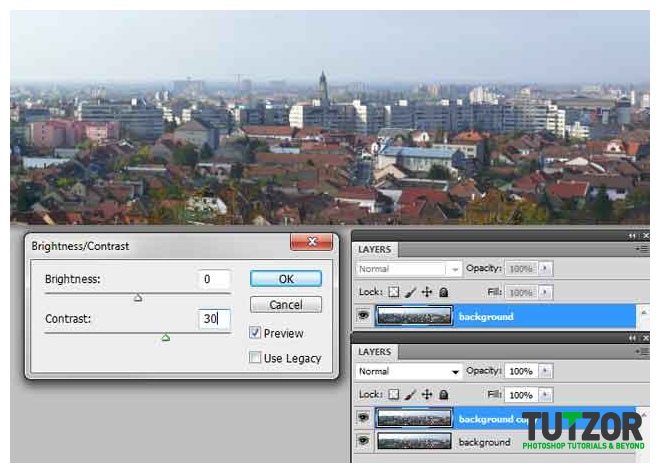
Go to image > adjustments > brightness / contrast and set the contrast to 30, then duplicate the background layer (CTRL+J).

Step
07
Member since:
Sep 2010
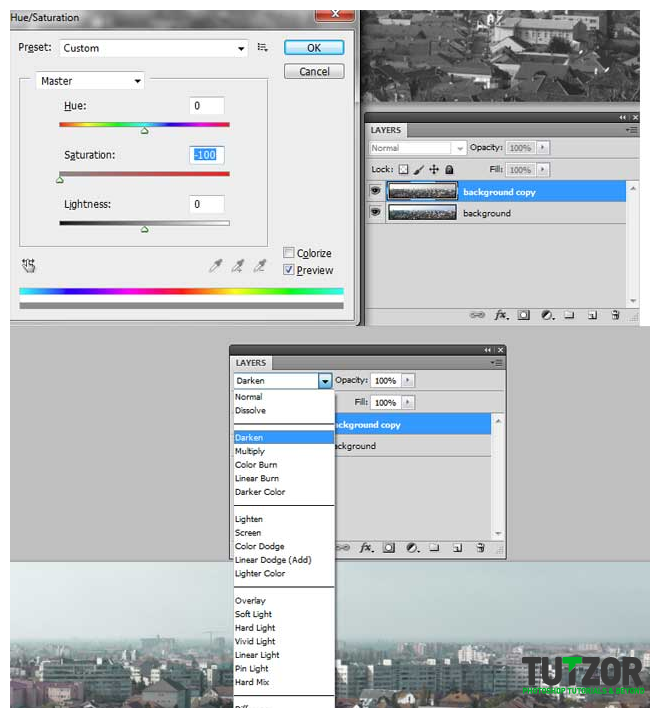
You need to desaturate the new layer, Image > adjustments >hue and saturation or just press CTRL+U and move the saturation to -100. Set the blending mode of the layer to Darken.

Step
08
Member since:
Sep 2010
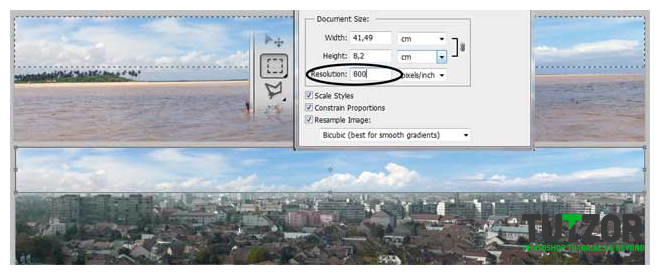
Open the image you’ve download from sxc.hu and make it bigger (Image > Image size> set the resolution to 800 px/inch). Next, cut (CTRL+X) the sky using rectangle marquee tool. Paste (CTRL +V) the sky image into our document, scale it to fit the canvas (CTRL+T) and rename the layer “Sky”

Step
09
Member since:
Sep 2010
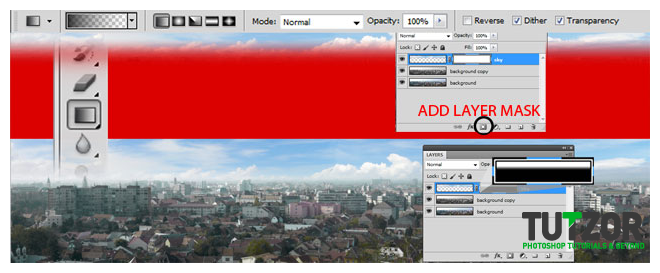
Add a layer mask to the sky layer and with the Foreground to Transparent linear gradient tool, draw in the mask like I marked for you.

Step
10
Member since:
Sep 2010
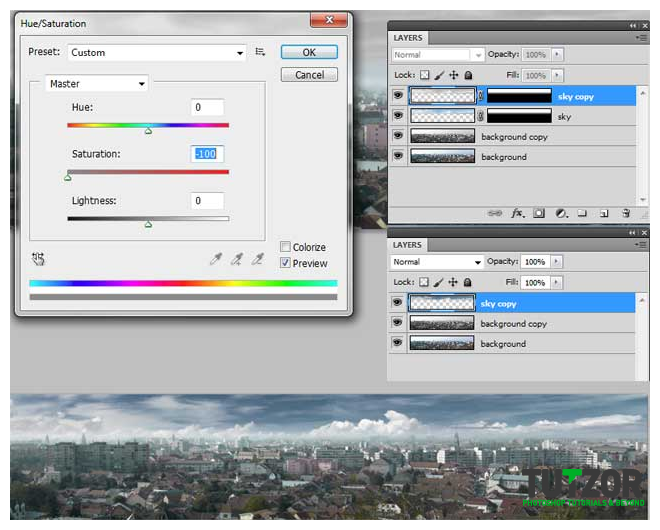
Duplicate the sky layer (CTRL+J), desaturate it (CTRL+U > saturation -100), set the blending mode to multiply and merge the 2 layers together (select them > right click > merge layers).

Step
11
Member since:
Sep 2010
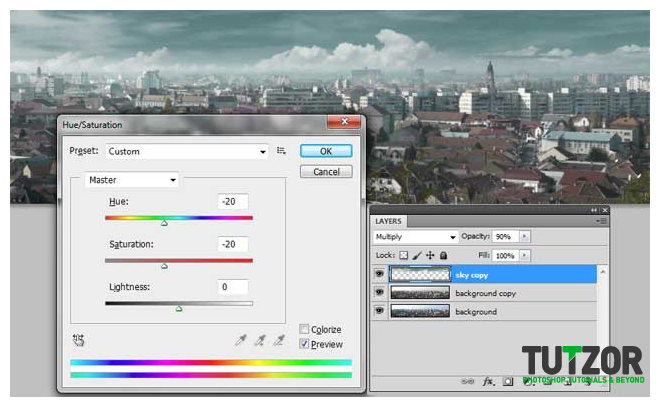
Now you have again only one layer for the sky so go to Hue/Saturation (CTRL+U), move the Hue -20 and saturation -20, set the blending mode multiply and opacity 90%.

Step
12
Member since:
Sep 2010
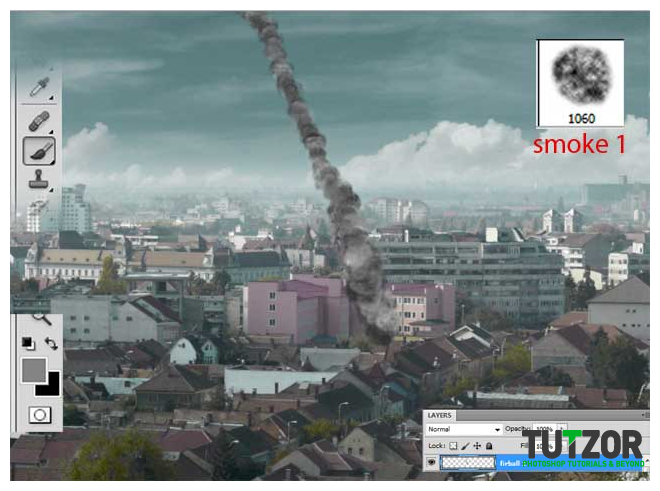
Next let’s start doing the apocalyptic scene. Pick “Smoke 1” brush from the set you’ve downloaded and using a 50% gray as foreground (#787878) and black for background, paint on a new layer like I did using a small size to a bigger one (call the layer “fireball 1”)

Step
13
Member since:
Sep 2010
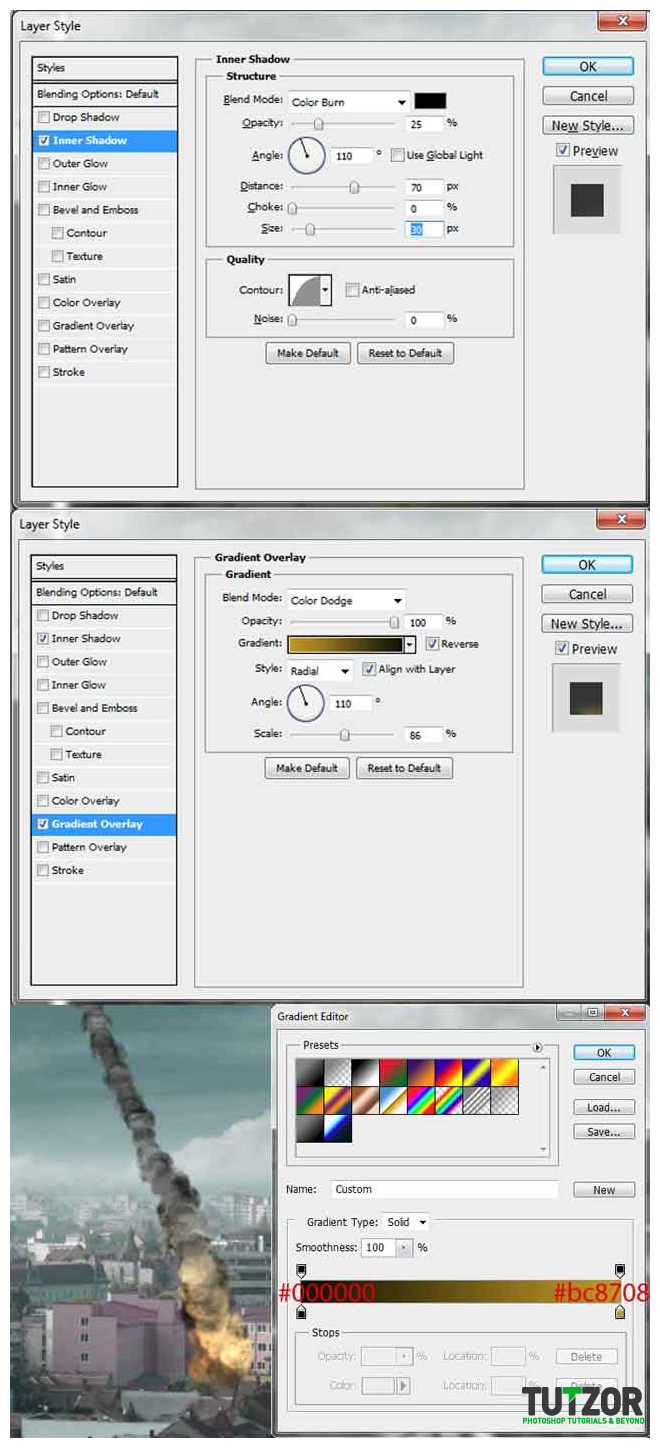
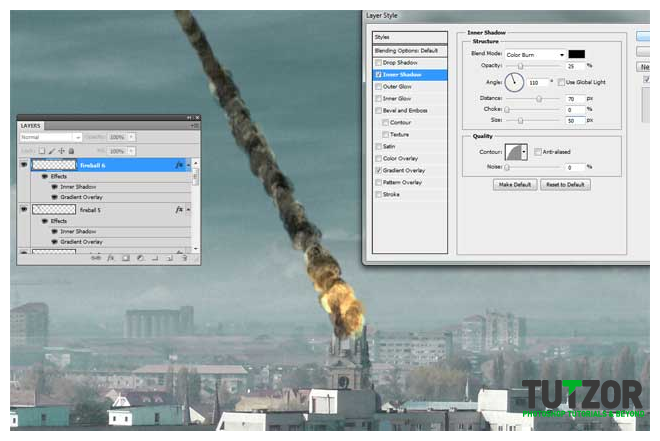
Now double click this layer for “layer style” and use my settings for Inner Shadow and for gradient overlay (drag the gradient overlay to the bottom of the smoke).

Step
14
Member since:
Sep 2010
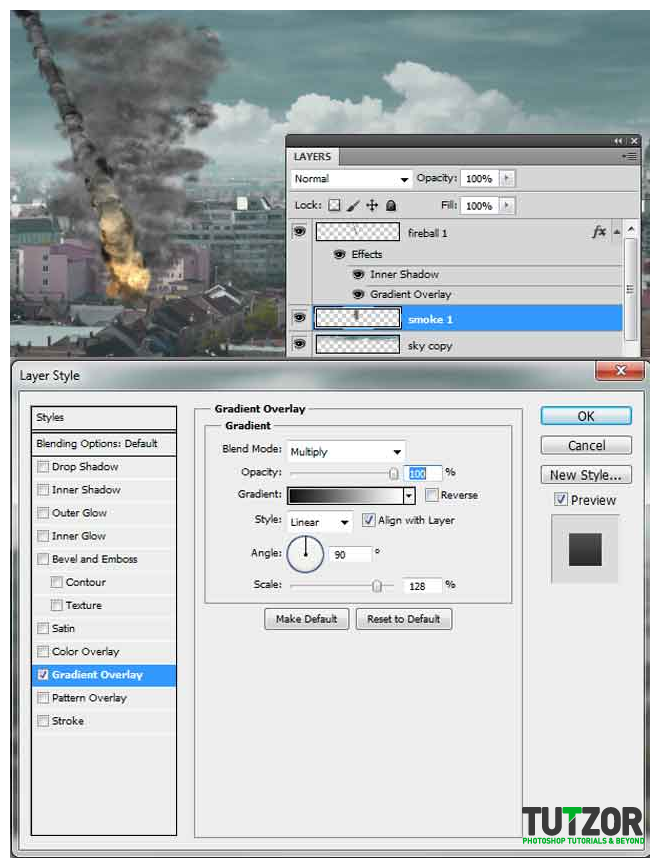
Next let’s add some dark smoke. Pick up the “Smoke 2” brush and using different sizes draw like me (Add a new layer “smoke 1” and use the same colors). Now double click the layer for styles and go to gradient overlay and use my settings.

Step
15
Member since:
Sep 2010
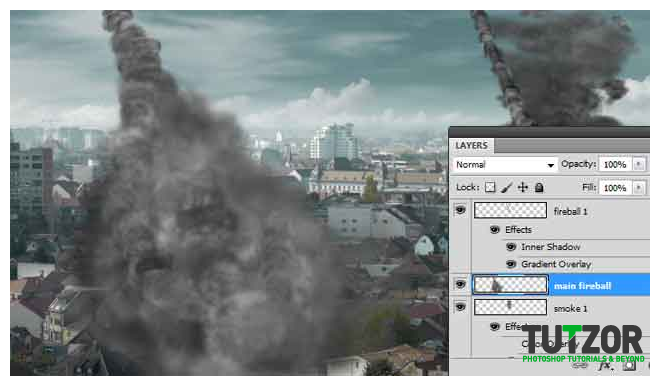
We’re going to do the main fireball, this will look very cool. Start by drawing like you did with the small fireball, use the same colors and “Smoke 1” brush. Add a new layer “main fireball” and using different sizes draw like me.

Step
16
Member since:
Sep 2010
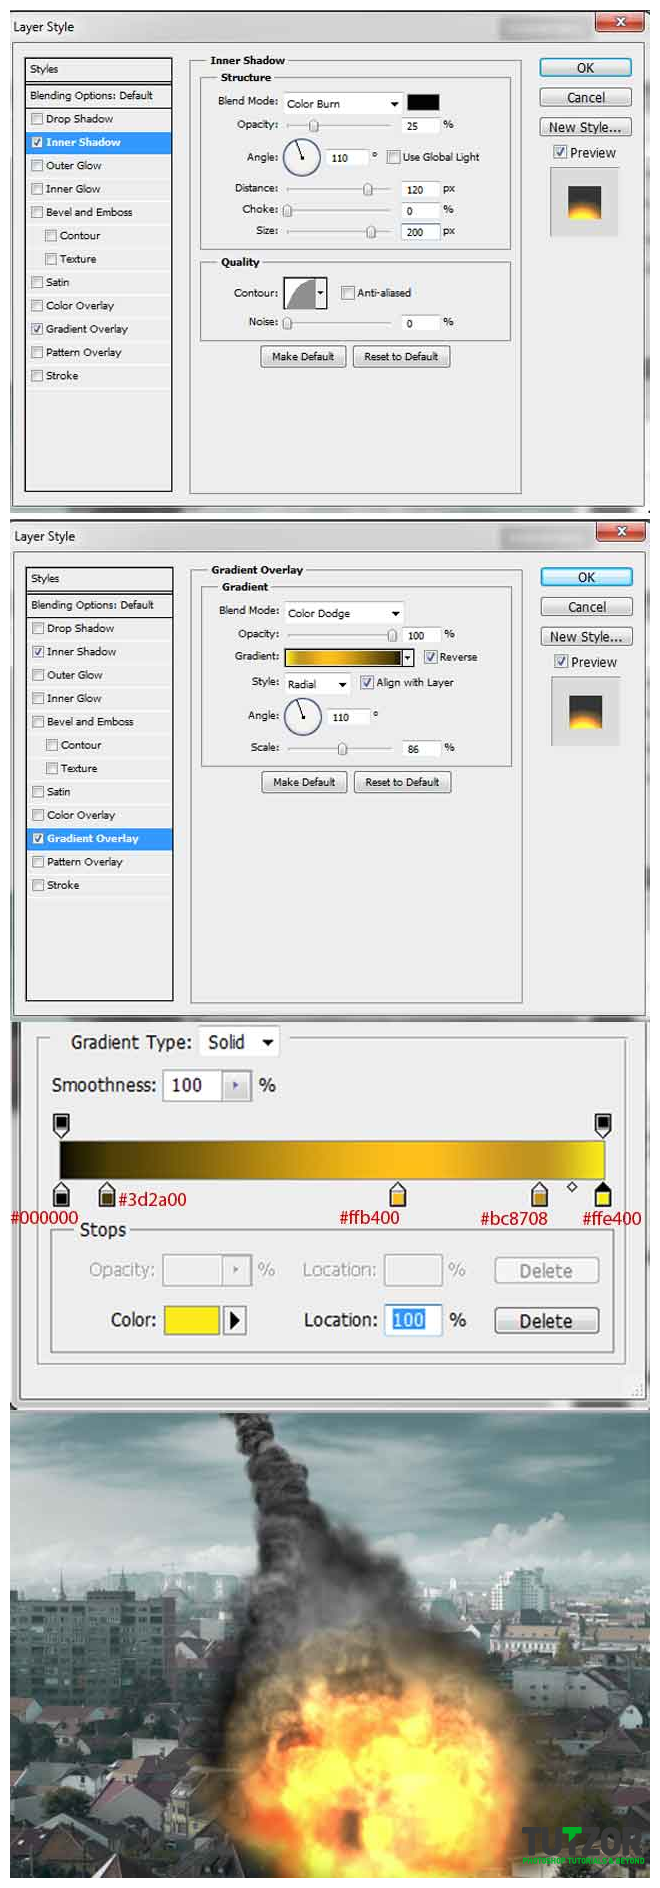
Add the same layer styles from step 13 but change the setting a bit (use mine or make your own settings)

Step
17
Member since:
Sep 2010
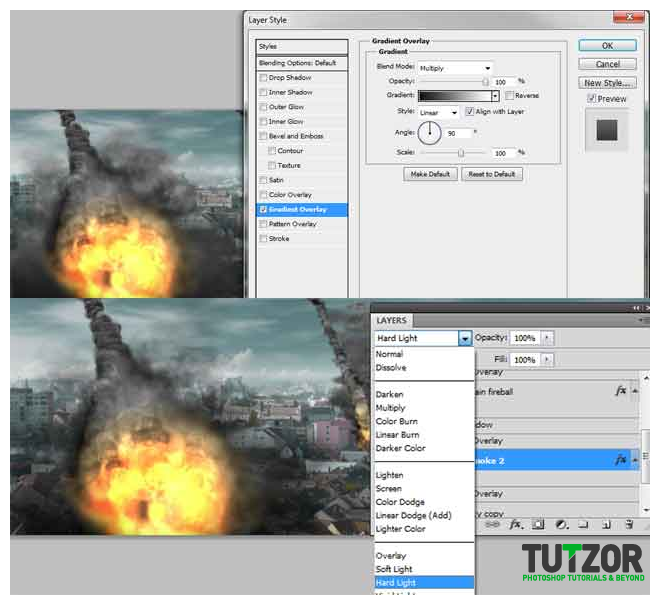
Add some smoke with the setting from step 14. Make a new layer under the “main fireball” layer and call it smoke 2 (use smoke 2 brush). After this, set the blending mode for this layer to Hard light.

Step
18
Member since:
Sep 2010
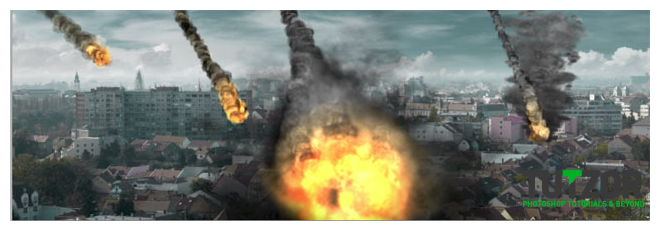
We need to add some more fireballs, small and big. You know how to make the effect so explore, use different settings, different gradients etc. look at my result, try to achieve it, it’s very easy, just repeat the same steps.

Step
19
Member since:
Sep 2010
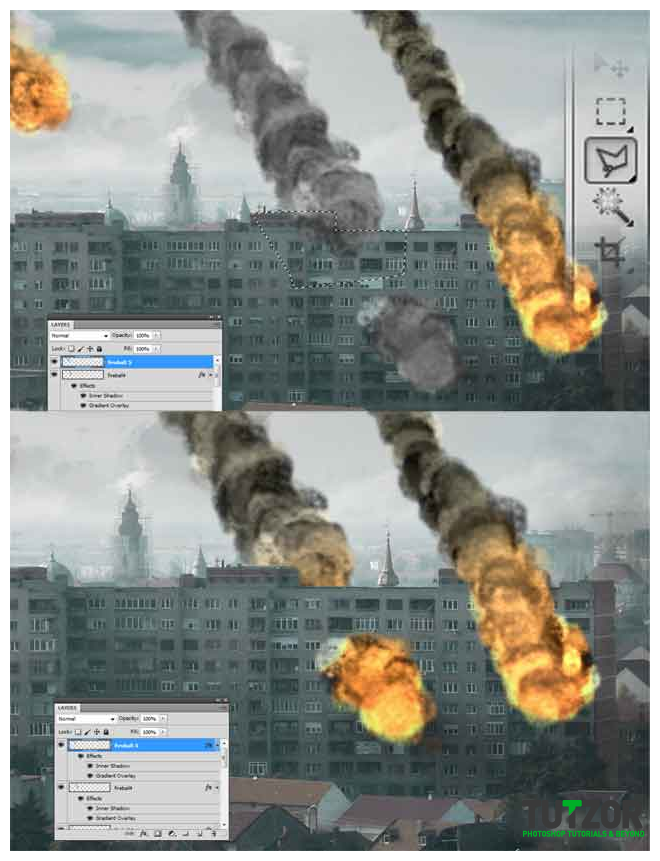
I’ll show you how to interact a fireball with a building. Paint with “smoke 1” brush on a new layer, then using Polygonal lasso tool make a selection around the edge of the building and delete the smoke from the selection. Next add the same style like you used to the others.

Step
20
Member since:
Sep 2010
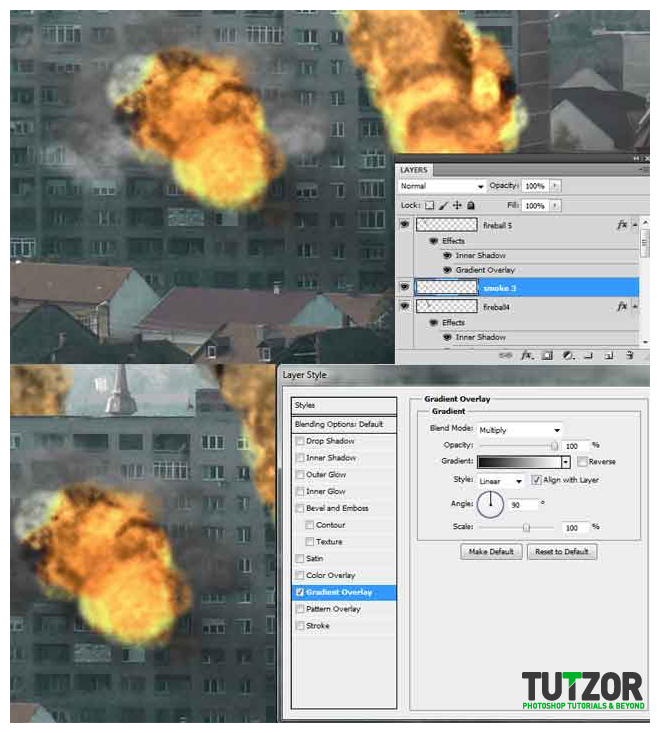
Add some smoke (using smoke2 brush) like me. Next use the layer style from “Smoke 1” layer, you should get something like I did.

Step
21
Member since:
Sep 2010
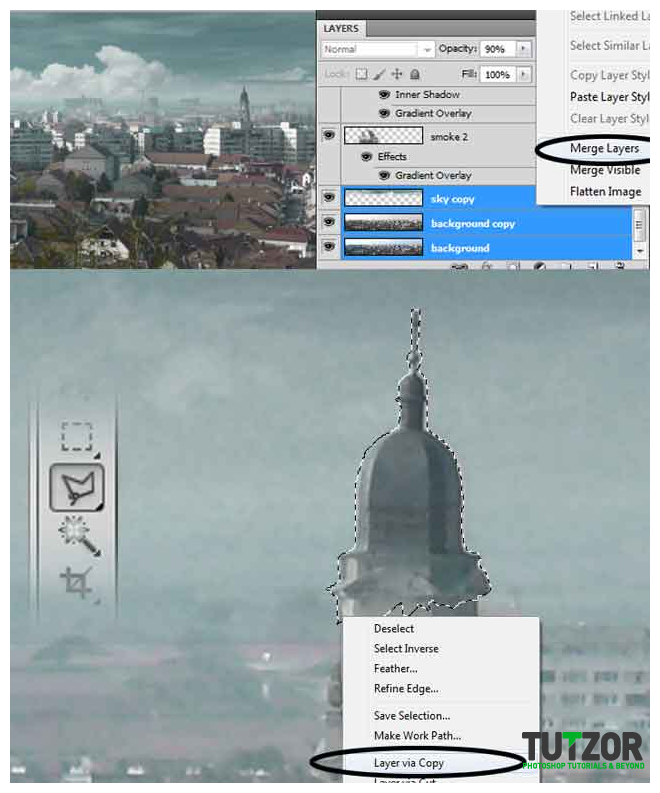
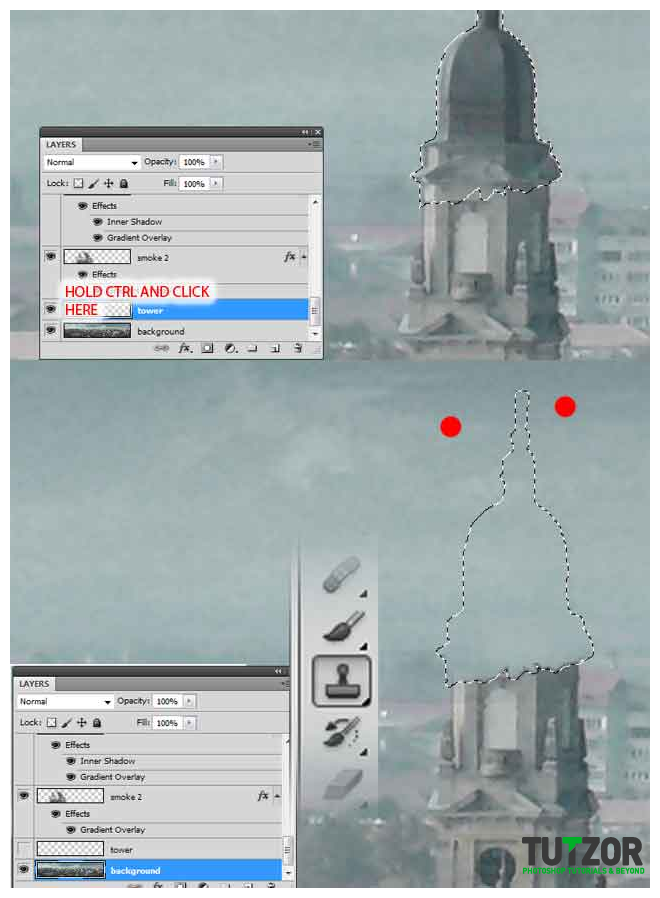
Merge the 3 layers from the background together (background, background copy and sky – select them > right click > merge layers >rename the layer “background”). Next, zoom in to the tower from the right and using polygonal lasso tool make a selection like me then right click > layer via copy (name the new layer tower).

Step
22
Member since:
Sep 2010
We need the tower selection again so hold down CTRL and click on the tower layer, this will do a fast selection of it. Disable the tower layer for now and on the background layer use the clone tool to fill the selection (use my clone points-for adding a clone point hold ALT and click on the area you want to clone)

Step
23
Member since:
Sep 2010
Draw a new fireball like me and add layer style to it like always.

Step
24
Member since:
Sep 2010
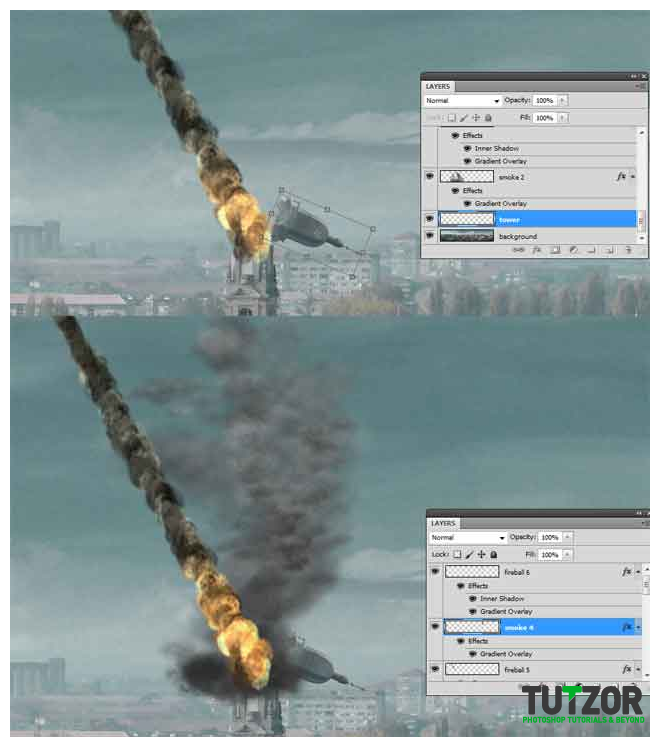
Make the tower layer visible again, rotate and move it(CTRL+T) as you see in the image. Next add some smoke on a new layer under the fireball, use the same style you used for smoke1 layer.

Step
25
Member since:
Sep 2010
Add some other fireballs to this image. For this tutorial you only need to be creative after you handle the effects.





Comments
Re: How to create an apocalyptic panoramic scene using Photoshop CS5 - PART 1
super i need your contect frd
awesome
great work .. really i like ur imagination