

 cosmin
Hello,
Today I'll show you all how to create a panorama using the algorithm of Photoshop CS5 and then for those who are advanced in photo manipulation I'll show you how to create an apocalyptic scene with fireballs and smoke.
You can use my images for this tutorial or you can take your own cool pictures. Don't forget to use a tripod and shoot a sequence of images for your desired place.
Also please donwload this image:
http://www.sxc.hu/browse.phtml?f=download&id=473937
Please download the zip file with the images and the brushes.
Hope you'll enjoy it.
 cosmin
 cosmin
 cosmin
 cosmin
 cosmin
 cosmin
 cosmin
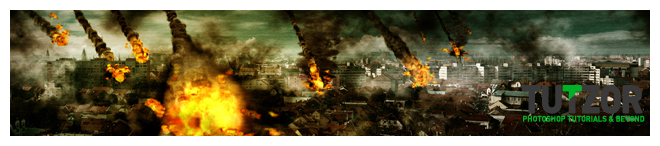
Copyright© 2012 Tutzor All Rights Reserved | Developed by: Iceous Design


Comments
Re: How to create an apocalyptic panoramic scene using Photoshop CS5 - PART 2
Great tutorial !thanks for your share !
Re: How to create an apocalyptic panoramic scene using Photoshop CS5 - PART 2
Nice job you've done there, Dave
Very cool!
Dave,
great job on the recreation of tutorial! love to see more!
Re: How to create an apocalyptic panoramic scene using Photoshop CS5 - PART 2
Amazing tutorial. Had a go using a picture I took earlier this year. Will be trying it again when I have taken another pano.
Have a look
http://www.t610wap.co.uk/online/belfast-under-fire.jpg
Thanks for posting.