

 cosmin
Hello everybody,
I'll show you all today how to do a photo manipulation, or a photo montage, call it as you wish.
Also you will learn how to use the lightning effect from photoshop.
I've used puppet warp a bit in this tutorial so if you can't handle it please take a look at my tutorial about puppet warp.
http://www.tutzor.com/tutorials/puppet-warp-cs5-new-feature-tutorial
Download all this images:
Boxer
http://www.flickr.com/photos/boltron/4098869023/sizes/o/in/photostream/
Boxing Bag
http://www.flickr.com/photos/crustina/2296577836/sizes/o/in/photostream/
Room
http://www.flickr.com/photos/schatz/891985/
Incandescent bulb
http://www.sxc.hu/browse.phtml?f=download&id=935130
Fluorescent bulb
http://www.sxc.hu/photo/1241346/?forcedownload=1
Crumpled paper
http://www.sxc.hu/photo/1214574
 cosmin
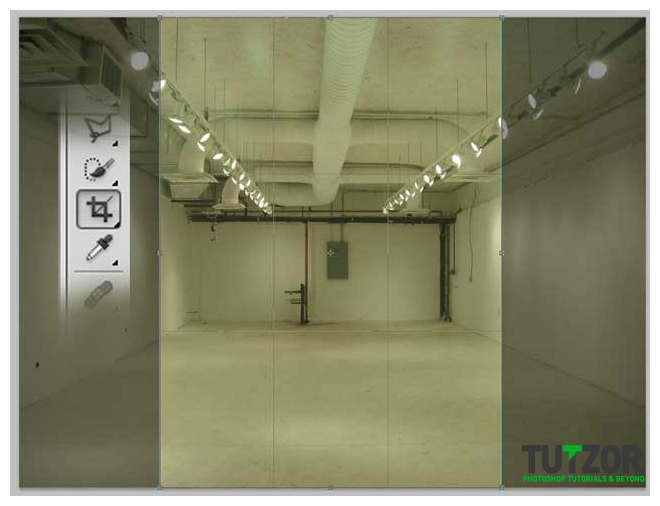 cosmin
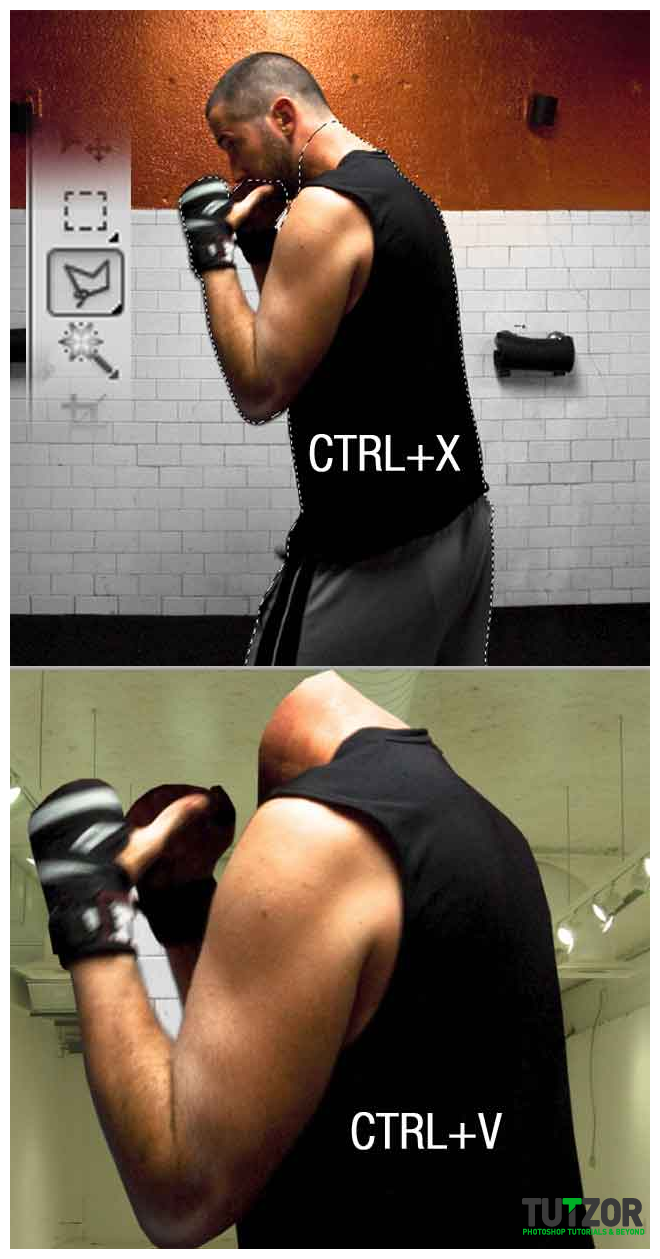 cosmin
 cosmin
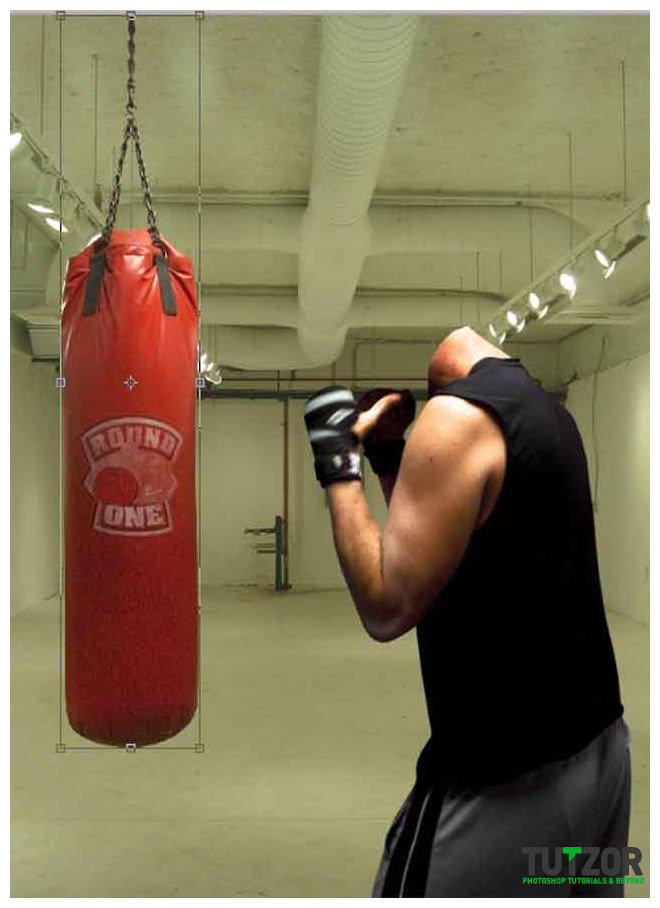 cosmin
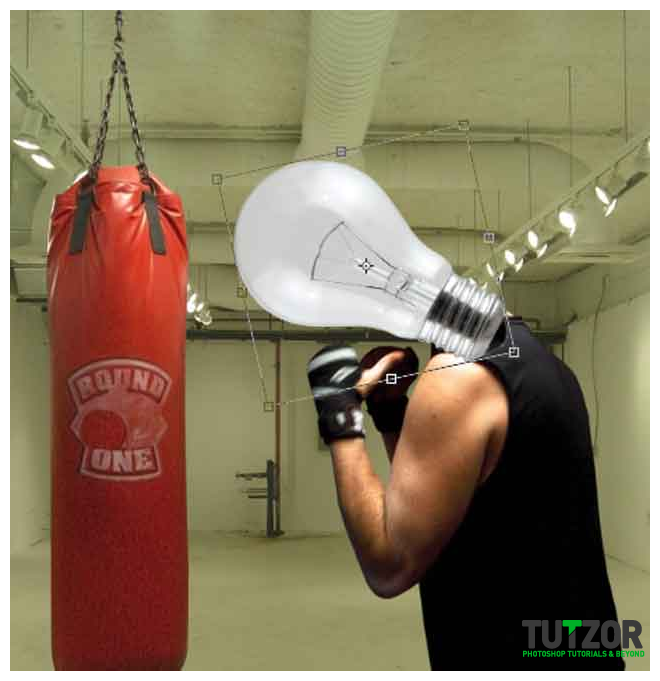 cosmin
 cosmin
 cosmin
 cosmin
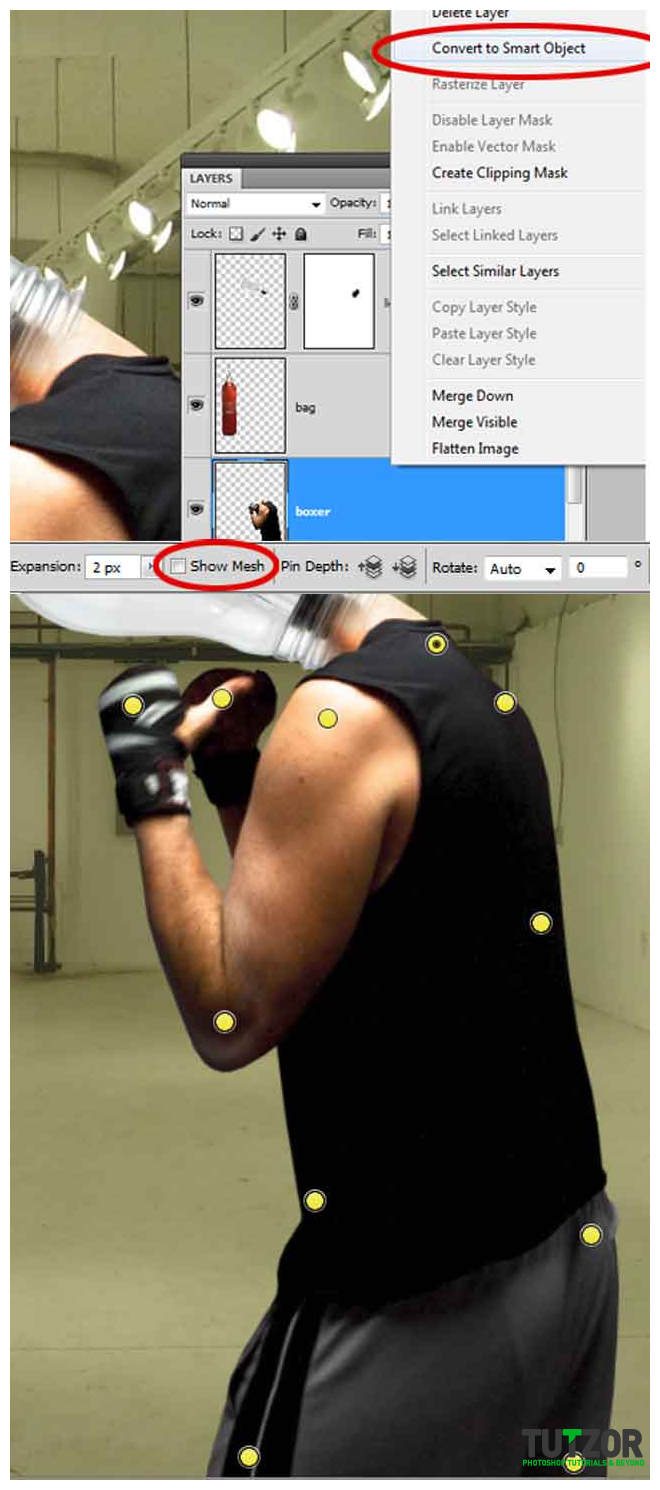 cosmin
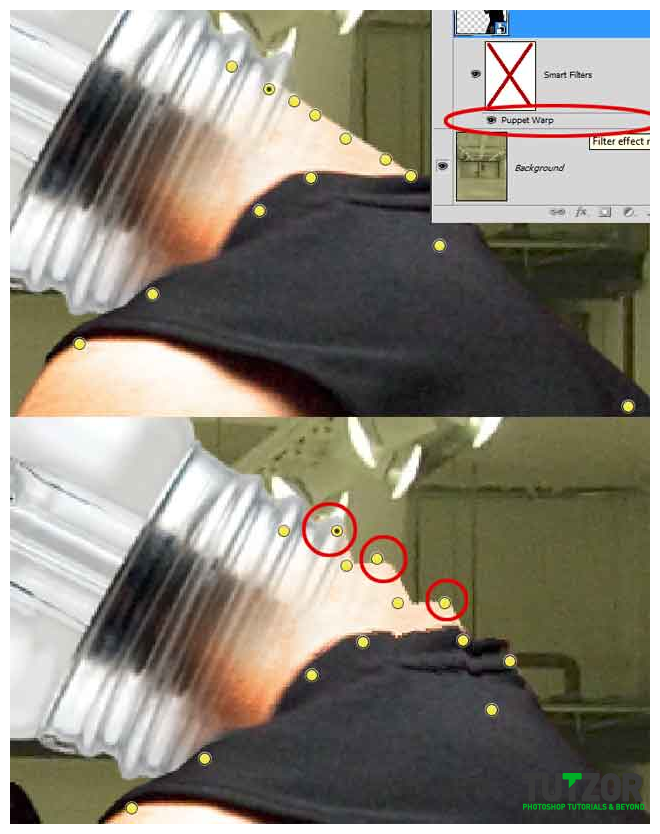 cosmin
 cosmin
 cosmin
 cosmin
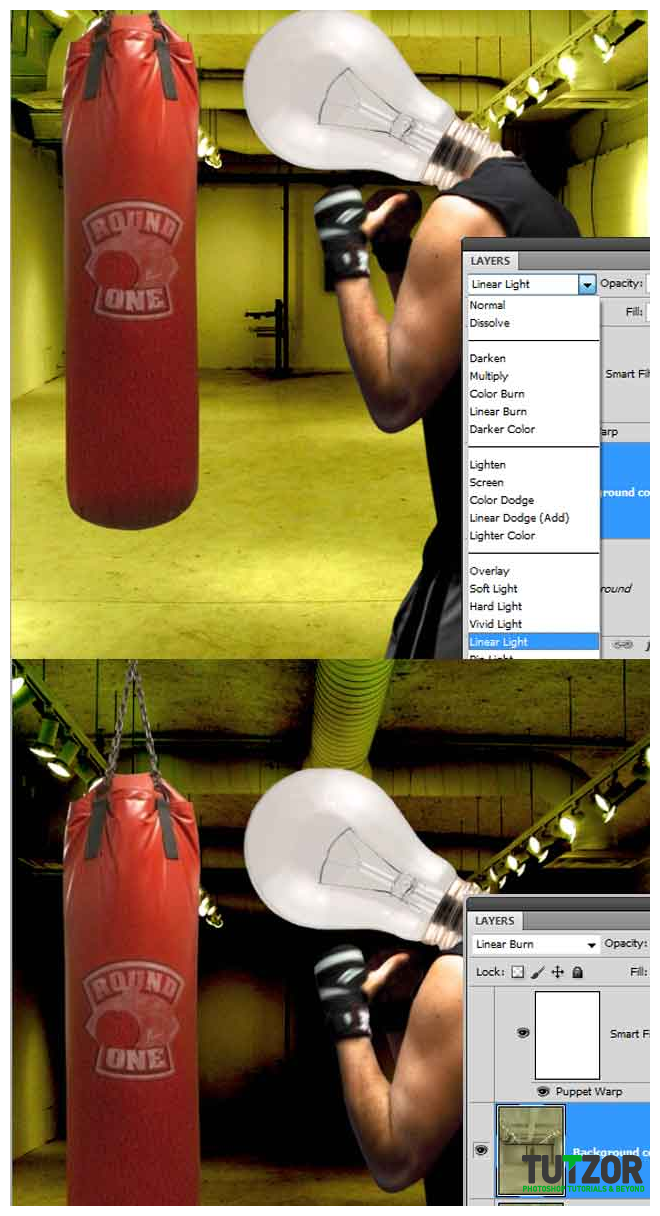 cosmin
 cosmin
 cosmin
 cosmin
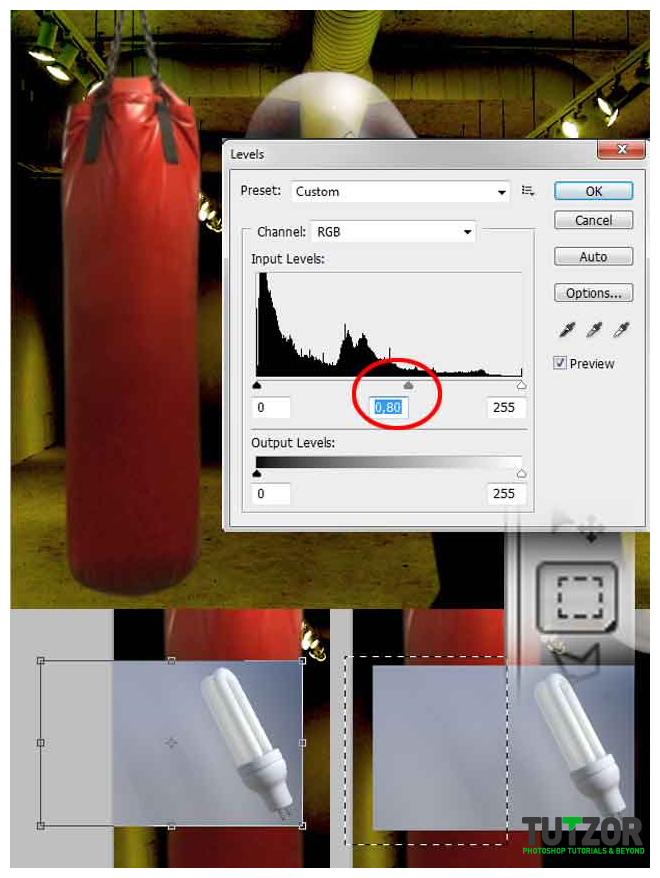 cosmin
 cosmin
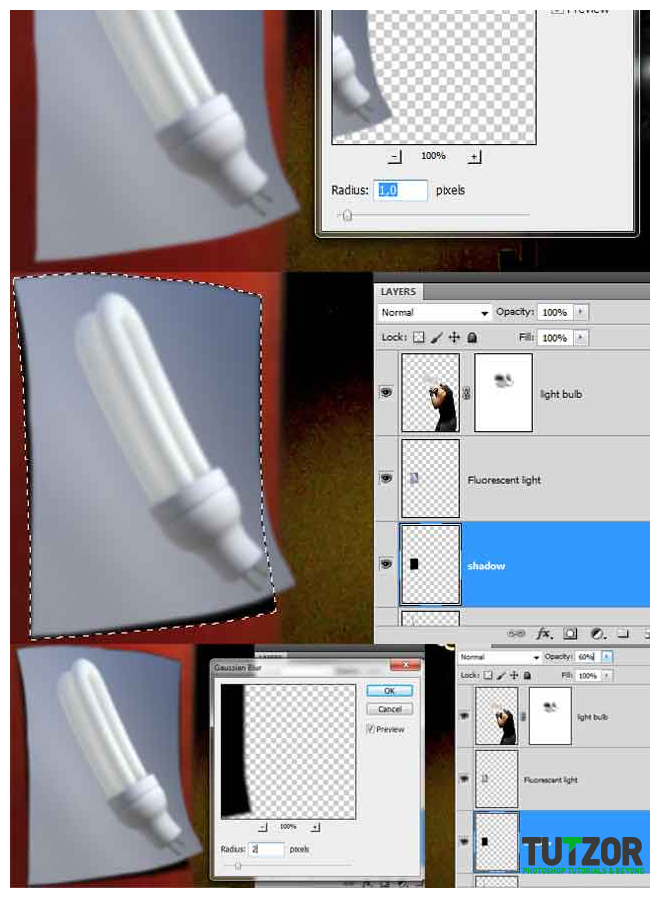 cosmin
 cosmin
 cosmin
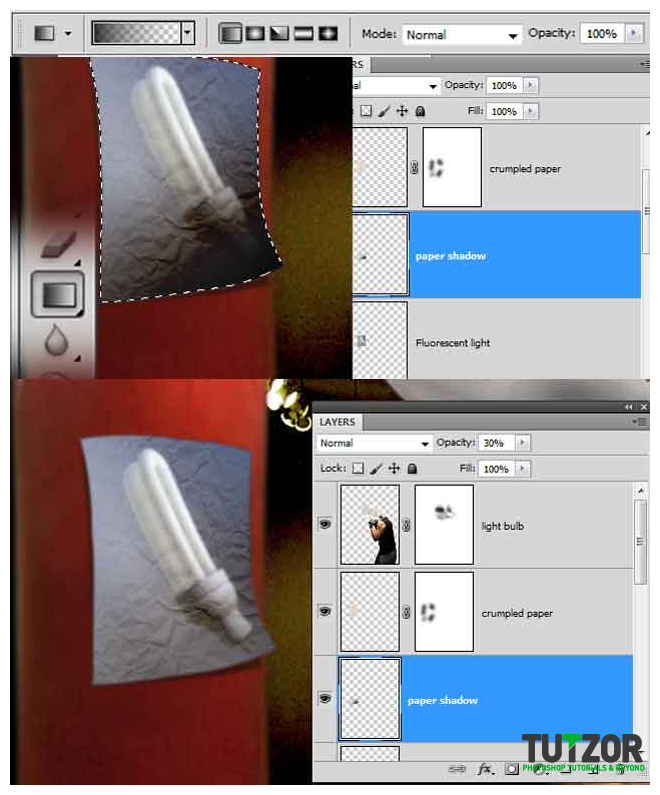 cosmin
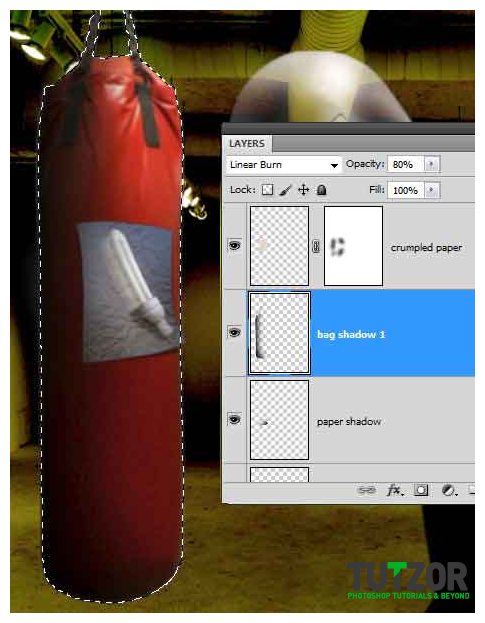 cosmin
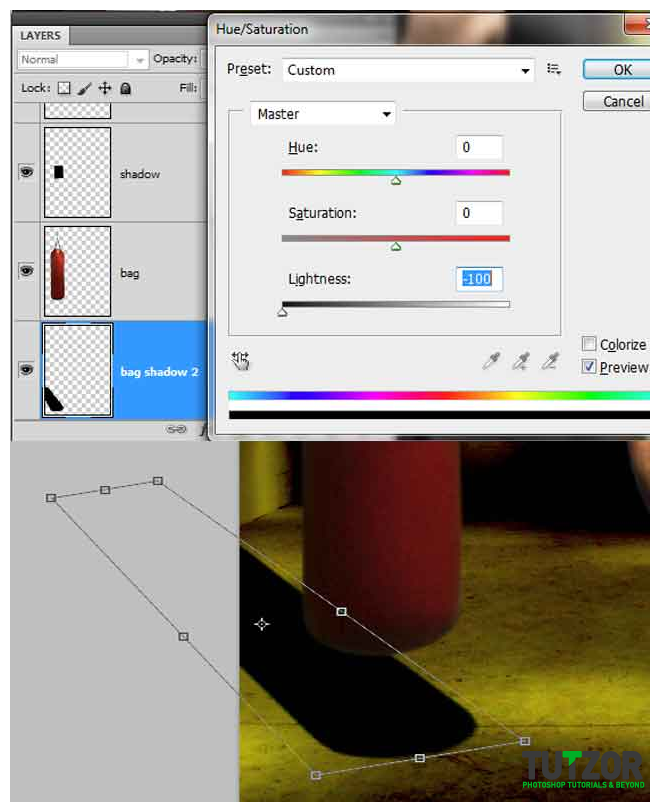
Copyright© 2012 Tutzor All Rights Reserved | Developed by: Iceous Design


Comments
Re: Funny photo manipulation - Incandescent vs. fluorescent light in CS5 - Part 1
Very exceptional photo manipulation work.