Funny photo manipulation - Incandescent vs. fluorescent light - Part 2
16
Nov'10
Member since:
Sep 2010
Step
26
Member since:
Sep 2010
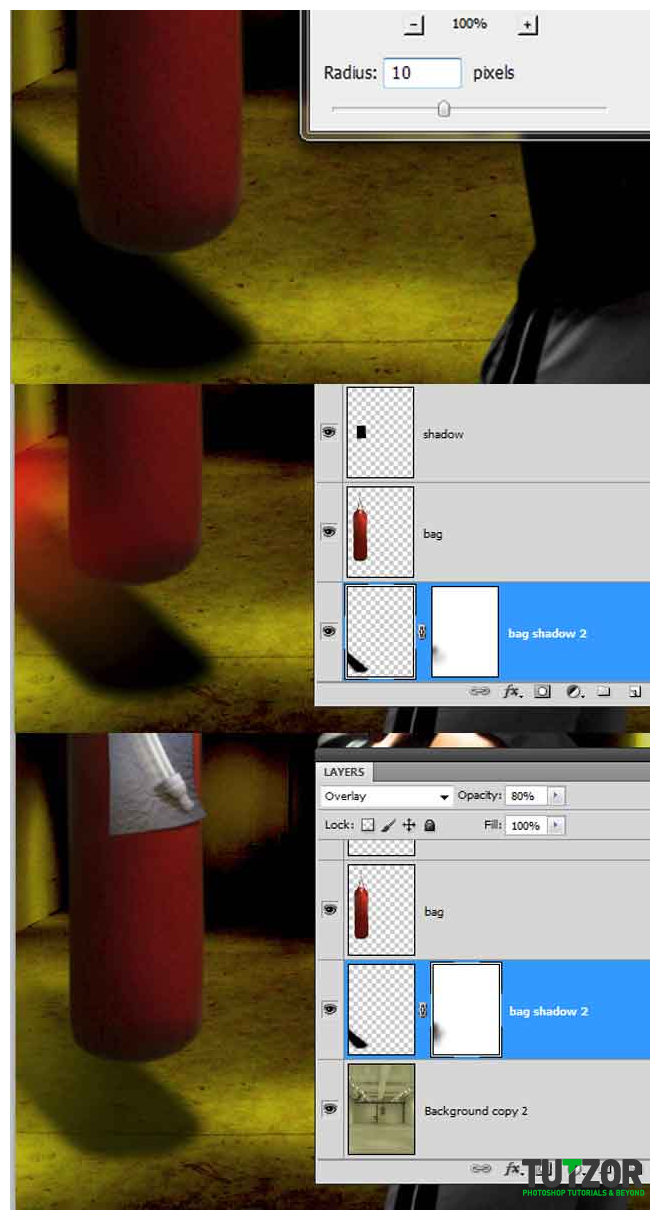
Go to filter > blur > gaussian blur > radius 10. Next, add a layer mask and paint with a soft rounded brush like i marked for you, then set the blending mode to overlay and the opacity to 80%.

Step
27
Member since:
Sep 2010
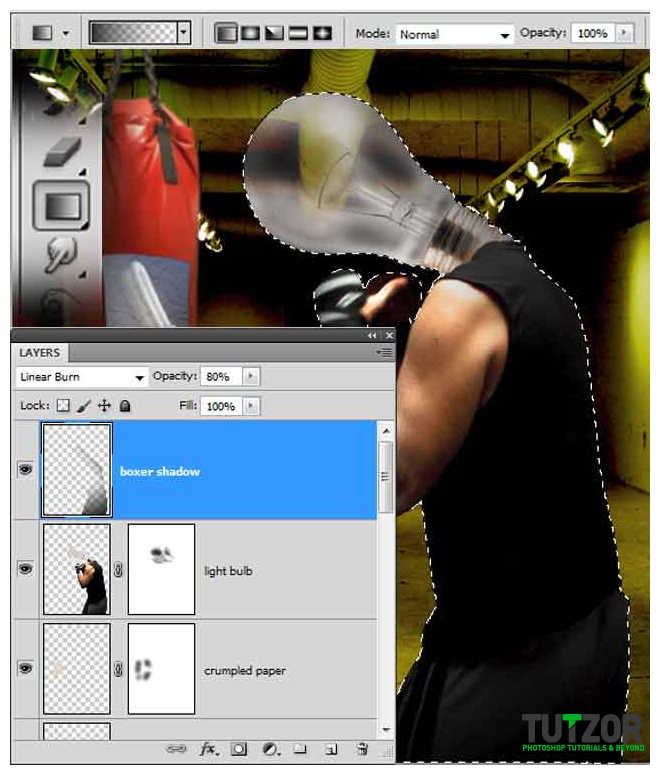
Add a new layer ( boxer shadow) and make a selection around the boxer (CTRL+click on the layer) and fill it with a black to transparent gradient like i did and set the opacity to 80%.

Step
28
Member since:
Sep 2010
Make a selection around the filament of the light bulb, then right click on the selection and go to layer via copy (call the new layer filament). Now double click on the new layer for styles and go to gradient overlay >blend mode overlay and use a gradient like i did. Next outer glow, use my gradient and the other settings.


Step
29
Member since:
Sep 2010
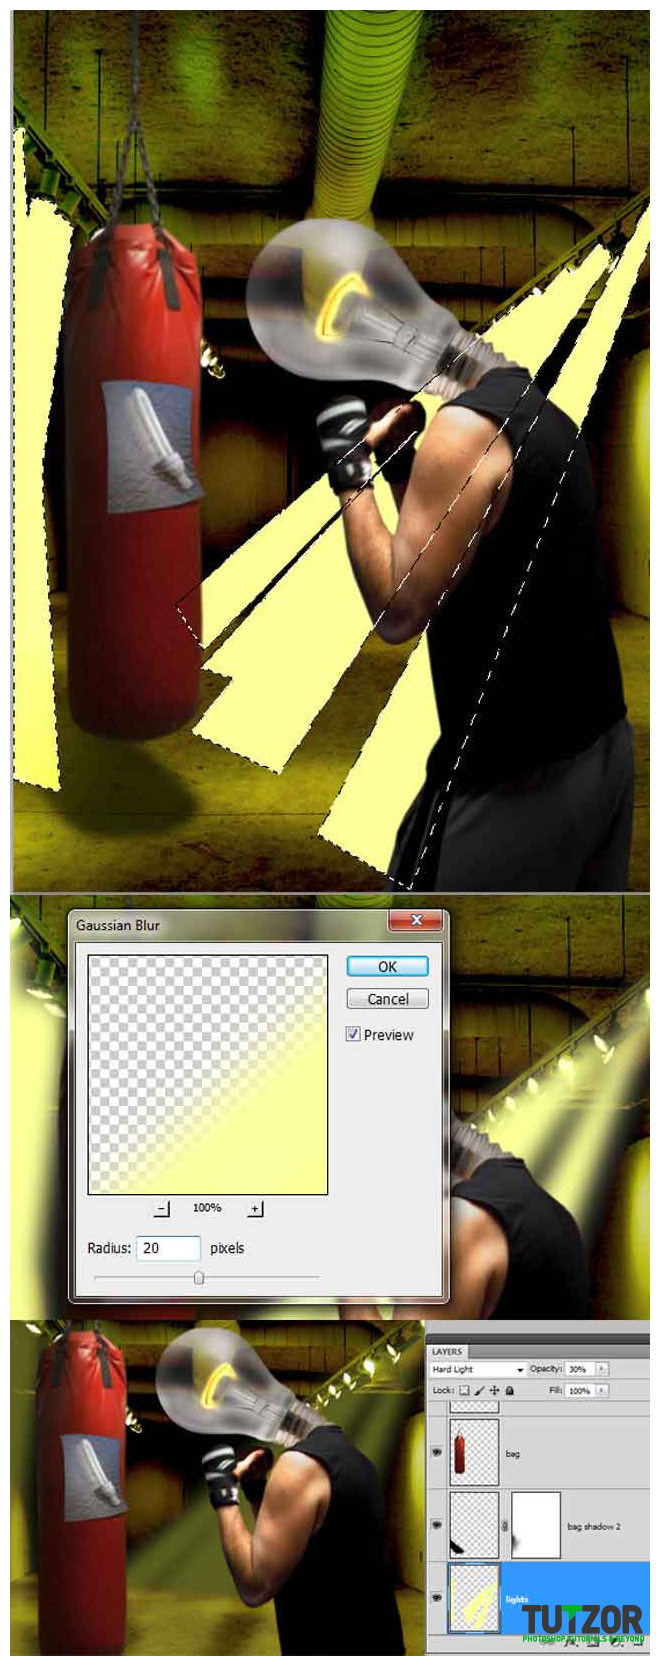
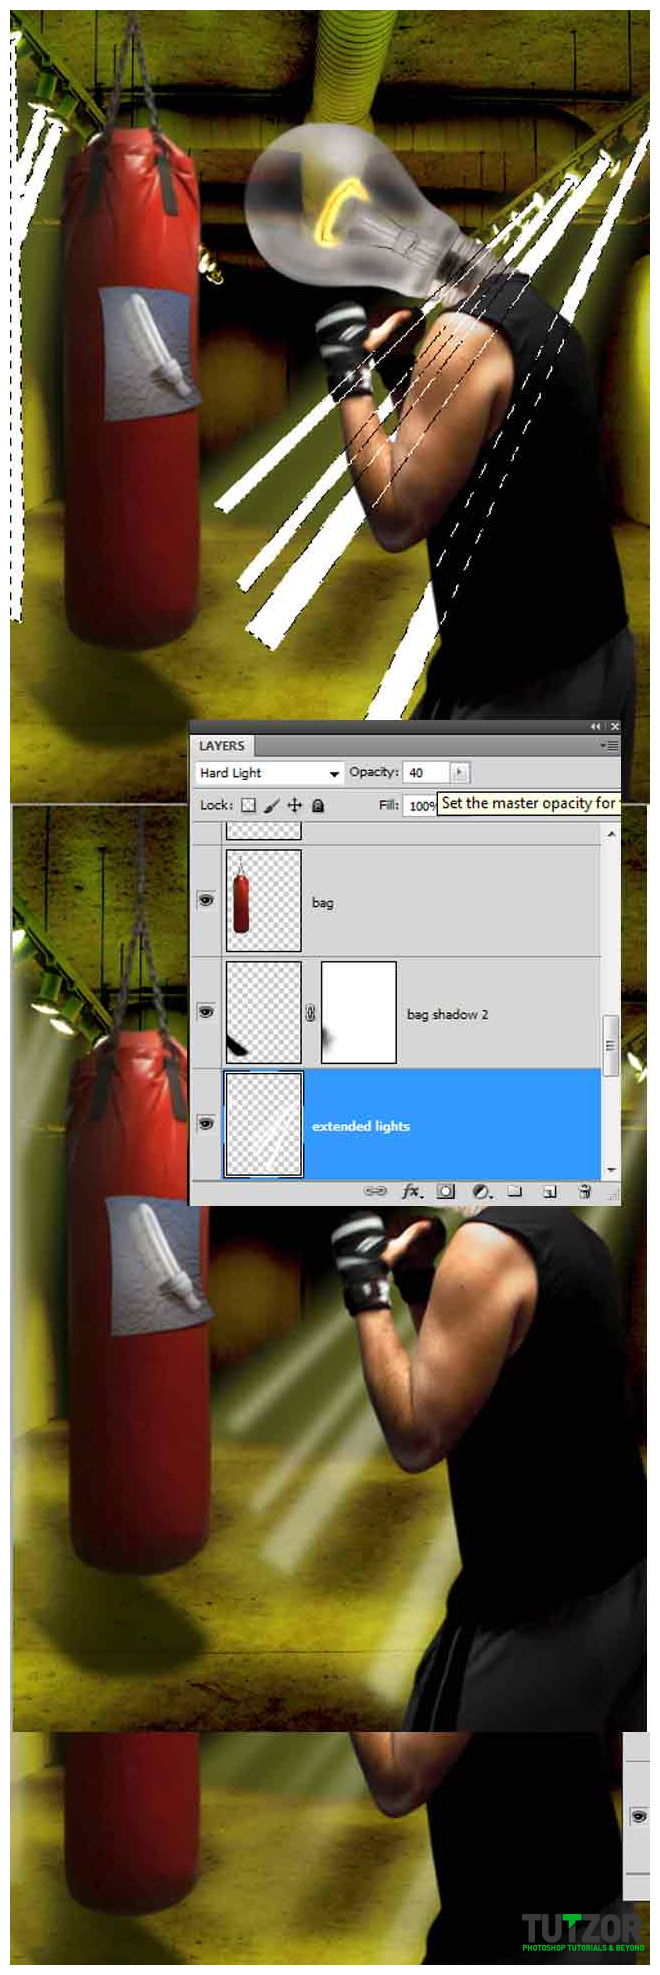
Add a new layer on top of the background and call it lights. Using Polygonal lasso tool add multiple selections ( if you need another selection when you aready have one just hold SHIFT and when you see a „+”, click to add a new one). Fill the selection with this color #ffff8e then go to gaussian blur and at set the radius to 20. Next set the opacity to 30% and the blending mode to hard light.

Step
30
Member since:
Sep 2010
Create another new layer on top of the lights (call it extended lights) and add a new selection like i did then fill it with white. Then gaussian blur with 20% blending mode hard lght, opacity 40%. Erase the hard edges using a soft brush like i did.

Step
31
Member since:
Sep 2010
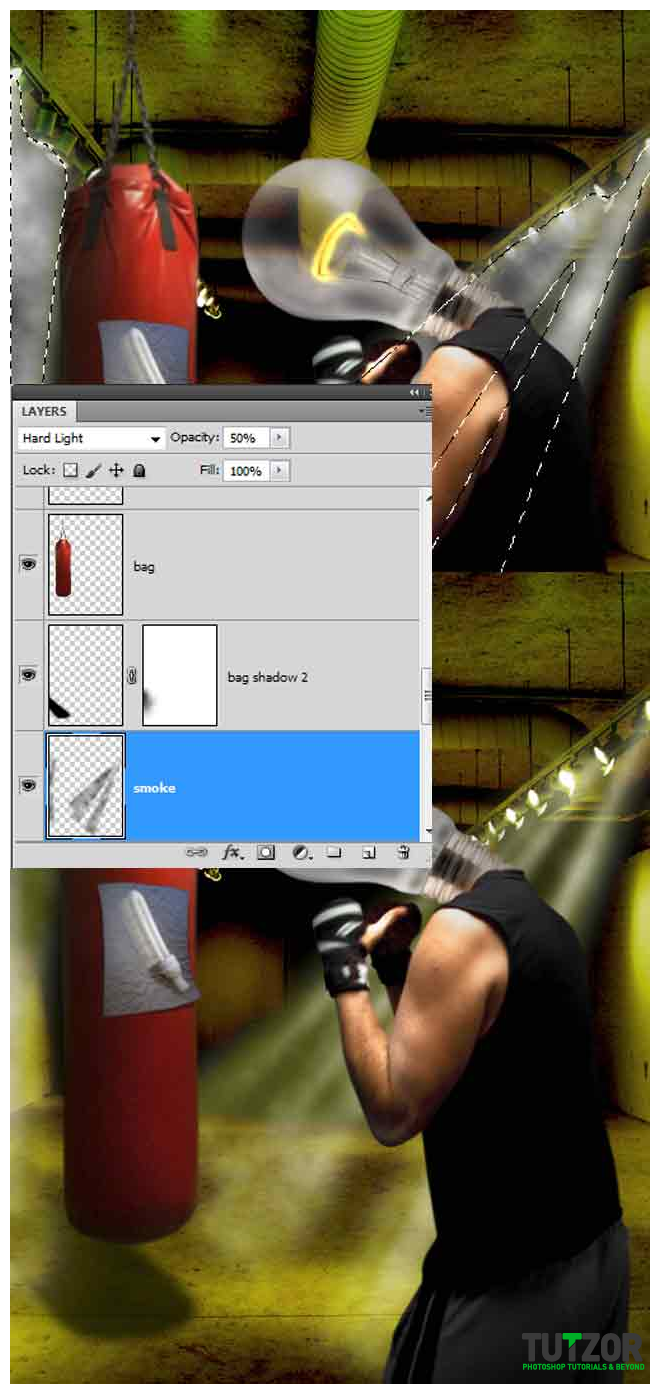
Add a new layer on top of the lights, call it smoke. Hold down CTRL and click on the lights layer to make a selection, then using white and a 50% gray go to filter > render > clouds. Next set the blending mode to hard light and the opacity to 50%.

Step
32
Member since:
Sep 2010
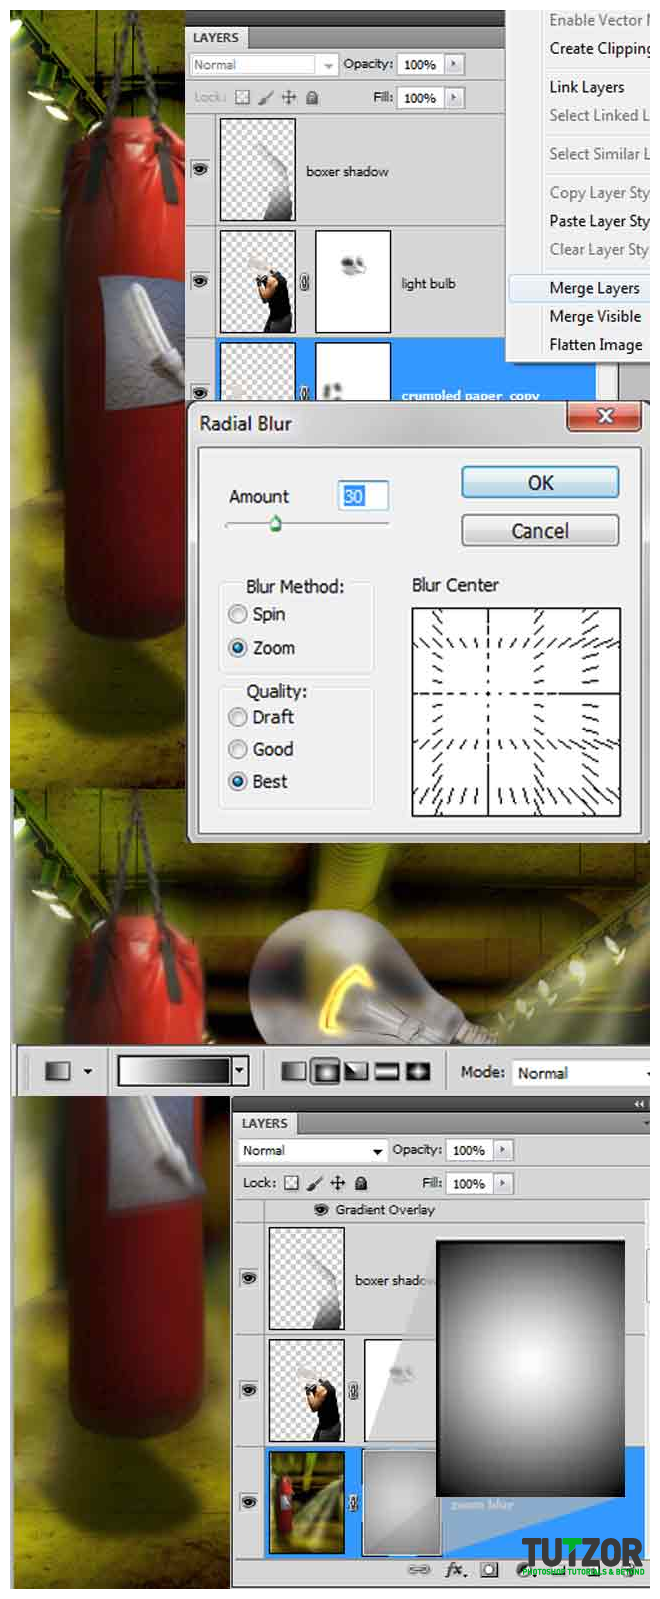
Now select all the layers without the boxer with his shadow and without the filament. Duplicate this layers (right click > duplicate) and merge them (right click > merge layers). Rename the layer „zoom blur” and go to filter > blur > radial blur and use my settings. The final step here is to add a layer mask then fill it with a white to black radial gradient.

Step
33
Member since:
Sep 2010
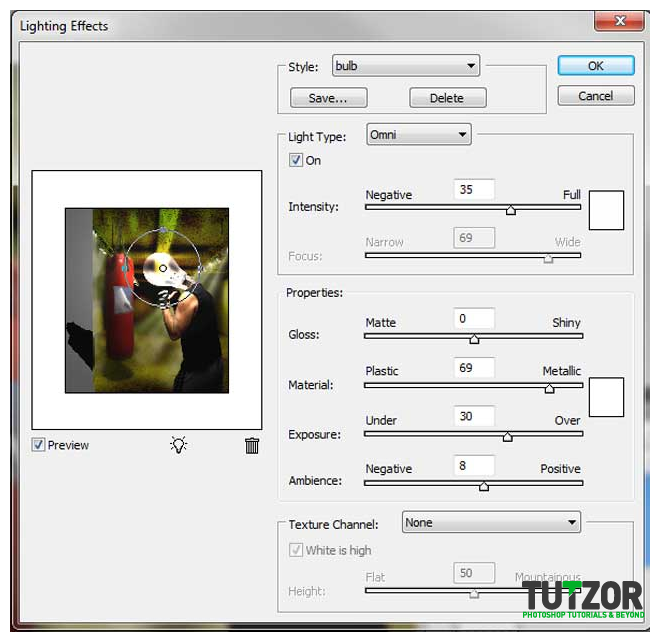
Select all the layers, duplicate and merge them. Call the new layer all layers then go to filter > render > lightning effects and use my settings.

Step
34
Member since:
Sep 2010
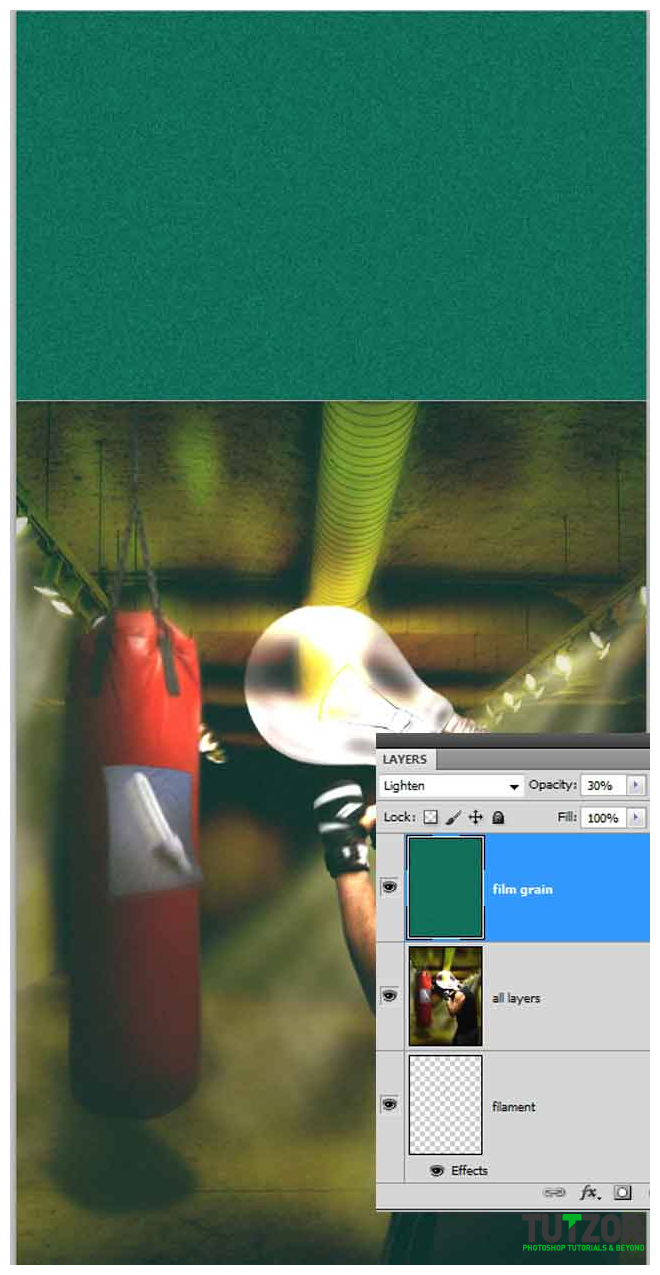
Add a new layer on top of everything else and call it „film grain”. Fill the layer with this color #009371 then go to Filter > artistic >film grain (grain 10, highlight area 0, intensity 5). Set the blending mode to lighten and the opacity to 30%.
