

 ilovegraphics
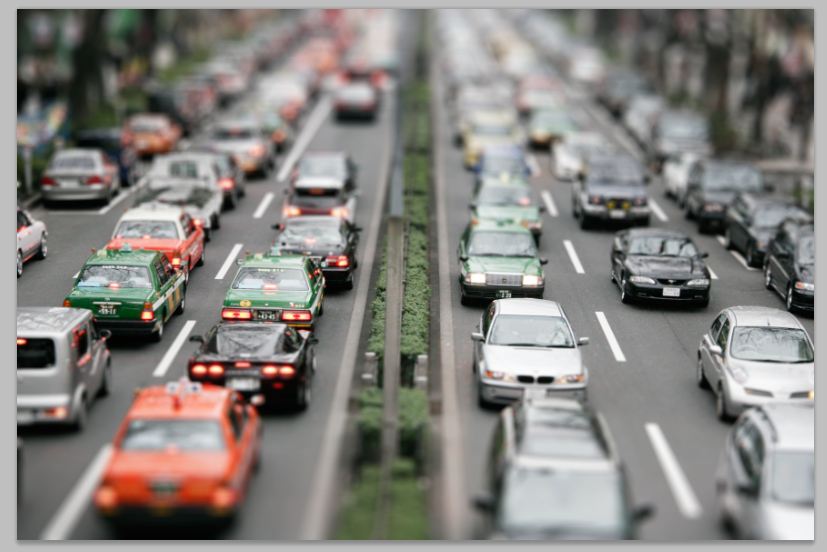
Some of the more advanced cameras these days come with the TILT SHIFT effect feature. This is a specialized feature in rendering photographs that make certain objects in the image look like they were miniature figures or objects.
 ilovegraphics
 ilovegraphics
 ilovegraphics
 ilovegraphics
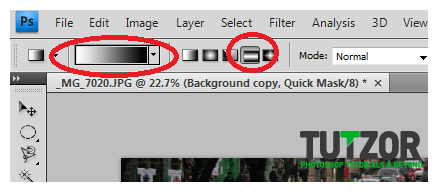 ilovegraphics
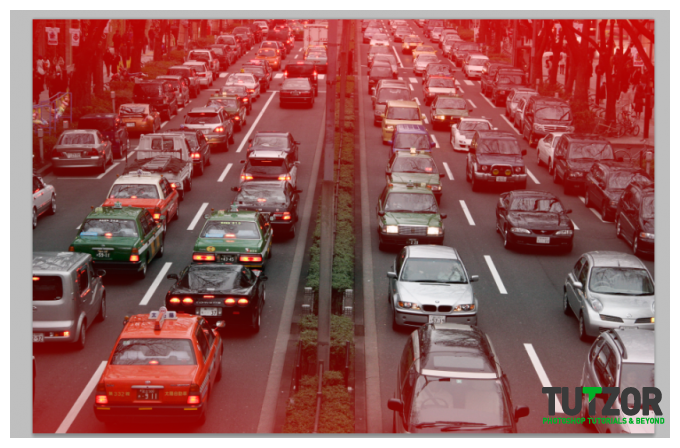 ilovegraphics
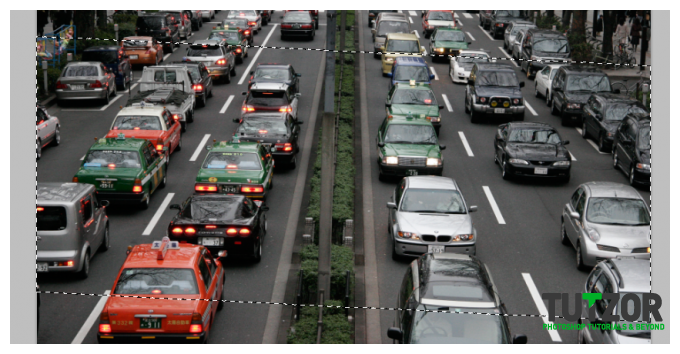 ilovegraphics
 ilovegraphics
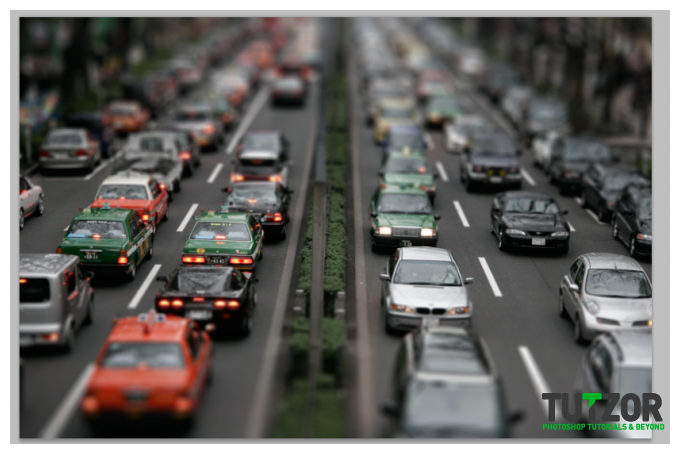 ilovegraphics ilovegraphics
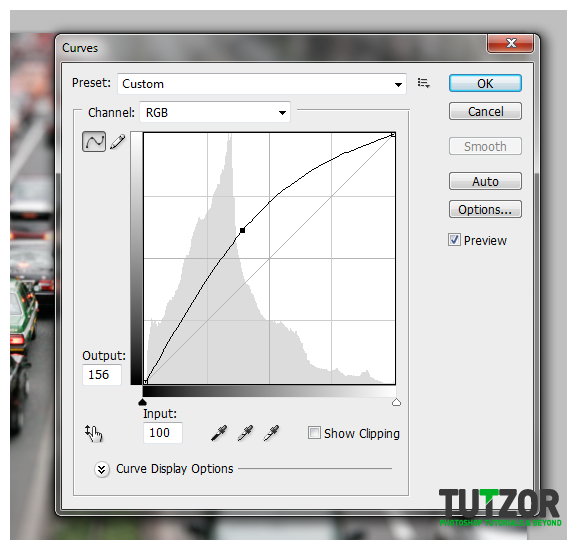 ilovegraphics ilovegraphics
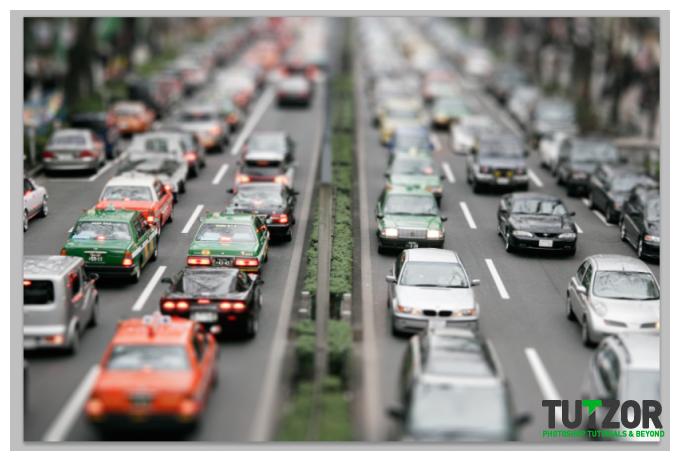
Copyright© 2012 Tutzor All Rights Reserved | Developed by: Iceous Design


