Realistic Smoke Effects in your Digital Print Designs Through Photoshop

14
Feb'12
irenethompson80
Member since:
Feb 2012

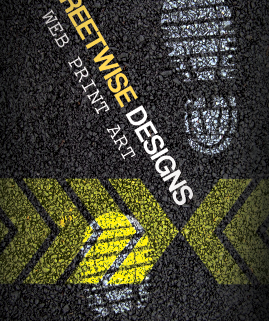
Designing the perfect business card that reflects your company's identity can be quite a challenge, much more if its designing an entire corporate identity package. Here are some ideas that can help you jumpstart your creativity.

Rating

Your rating: None Average: 3.8 (33 votes)

Required Files

Final Image

Step
01
irenethompson80
Member since:
Feb 2012
Do you need some realistic smoke or mist effects for your flyers, catalog prints and brochure designs? Besides copying actual smoke images from the Internet, you can actually make those realistic smoke effects easily through Photoshop. You do not even hire an expert. You just need your own installation of Photoshop and some basic knowledge on how to use it. Let me teach you how to create realistic smoke effects in your digital print designs for posters, booklets etc. Just follow these steps here and you should easily understand what to do. 1. Create your document first of course. Make sure that you are setting your size right, so that it fits whatever kind of cover or digital design you are creating. Set the appropriate resolution as well. For our purposes, we are setting it at 72 for web images, but for printing this should be somewhere at 300 pixels per inch or higher.
Step
02
irenethompson80
Member since:
Feb 2012
2. Now, start by adding a black background so that we can easily see our smoke. Just use the paint bucket tool to splash black throughout the canvass.
Step
03
irenethompson80
Member since:
Feb 2012
3. Next, create a new layer by pressing “Ctrl +Shift + N”. Just choose the default options for the layer when the window opens and click on ok.
Step
04
irenethompson80
Member since:
Feb 2012
4. The fun starts here. Using a white color, use the Pen tool, Brush tool or the Shapes tool to draw in random shapes, much like wisps of smoke. NOTE: it does not have to be perfect. Just enjoy splashing it randomly.
Step
05
irenethompson80
Member since:
Feb 2012
5. It looks amateurish now, but we will apply the Gaussian blur effect to diffuse these shapes. First select your layer. Then click on Filter -> Blur -> Gaussian Blur.
Step
06
irenethompson80
Member since:
Feb 2012
6. Set the blur to around 20 pixels to get a fuzzy effect.
Step
07
irenethompson80
Member since:
Feb 2012
7. Press ok once you are satisfied. However, this is not enough, we need to add a liquefy filter as well. Just click on Filter -> Liquefy to add a liquid filter to the layer.
Step
08
irenethompson80
Member since:
Feb 2012
8. Just play around with the brush to liquefy parts of the blurred elements.
Step
09
irenethompson80
Member since:
Feb 2012
9. Press OK once you are done.
Step
10
irenethompson80
Member since:
Feb 2012
10. You will want to experiment a bit more to get the smoke size and shape that you want.
Step
11
irenethompson80
Member since:
Feb 2012
11. Now, in our example, we have positioned the smoke a bit on the centre to focus on them.
Step
12
irenethompson80
Member since:
Feb 2012
12. We also reduced the opacity of the white smoke so that it looks more faded. Next, we’ll add more colour variation into the smoke clouds to make them look better. Simply right click on the smoke layer that you want to edit and click on “blending options”
Step
13
irenethompson80
Member since:
Feb 2012
13. Tick the option for gradient overlay. And choose two to three different colours for your smoke.
Step
14
irenethompson80
Member since:
Feb 2012
14. Do the same to the layer of smoke that we created earlier, which is now on a lower opacity. Vary the colour a bit to make things interesting.

Comments