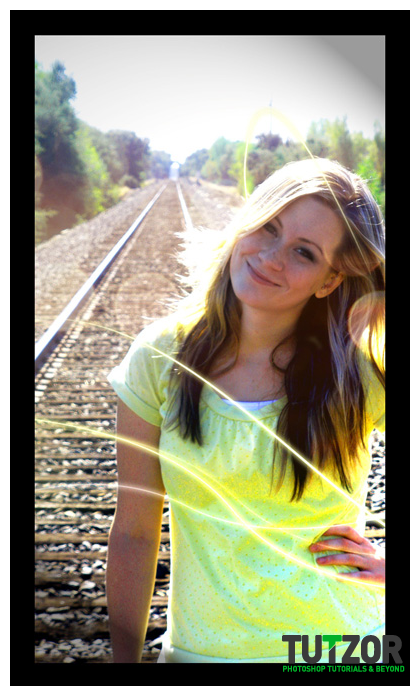
Simple light effect to your everyday photo
10
May'11
 sunrise20
Member since:
Mar 2011
Step
01
 sunrise20
Member since:
Mar 2011
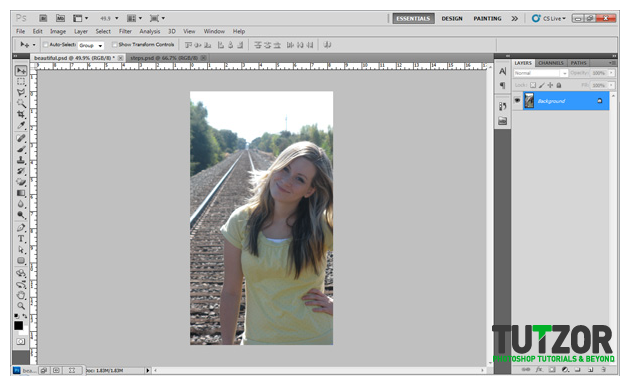
Open the image called "Beautiful".

Step
02
 sunrise20
Member since:
Mar 2011
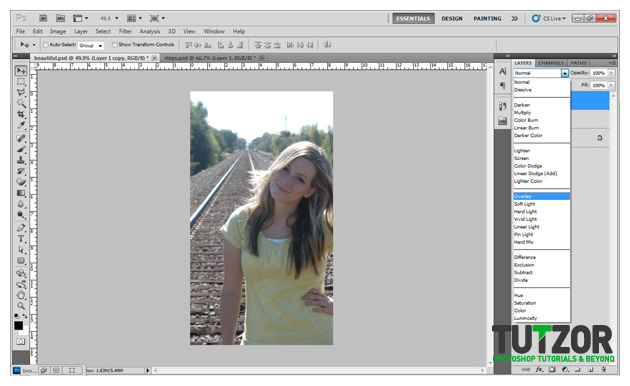
Duplicate the layer twice and change the top layers blend mode from normal to overlay. The reason we duplicate the layer twice is so that we have our background layer as the original layer just in case we want to start over and middle layer is being used along with the top layer.

Step
03
 sunrise20
Member since:
Mar 2011
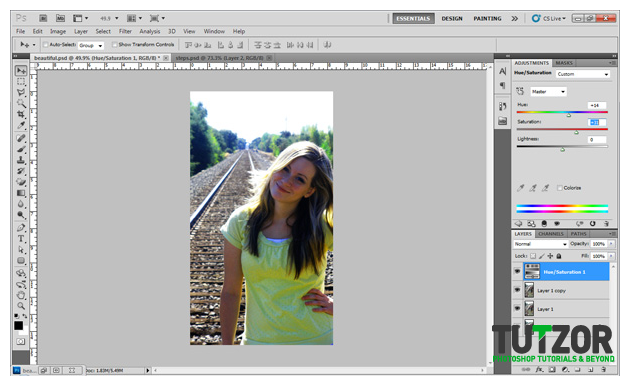
Next I want to bring out the colors of her shirt so I will create a new hue/saturation adjustments layer by clicking on the half filled circle icon located at the bottom of the layers palette. I will set my adjustments to +14, +31 and 0.

Step
04
 sunrise20
Member since:
Mar 2011
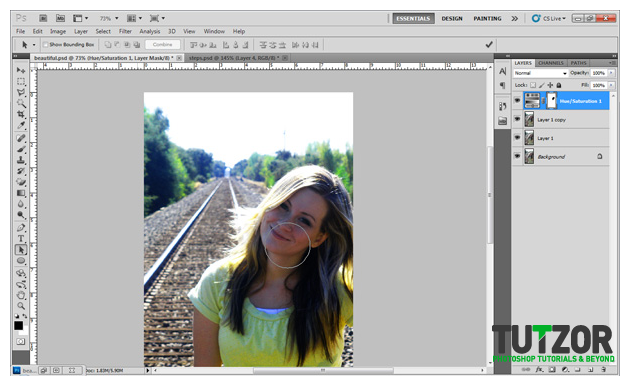
Then I will add a layer mask to this adjustment layer by clicking on the circle inside the square icon located at the bottom of the layers palette. By using the brush tool and having your foreground color set to black, brush over her face so that the adjustment layer will not affect the color of her face.

Step
05
 sunrise20
Member since:
Mar 2011
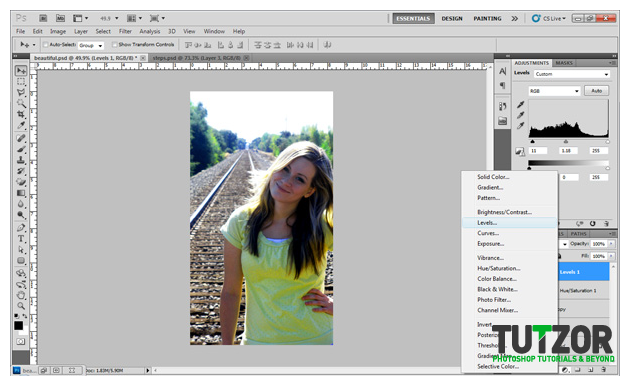
I am going to add another adjustment layer which will be the levels adjustment layer. Change the numbers to reflect what you see in the picture. I set mine to 11, 1.18 and 255.

Step
06
 sunrise20
Member since:
Mar 2011
Now that we have a great color balance in our image, I want to add some glowing lines. To do this we will be using the pen tool to draw our lines. Create a new layer and name this layer "glow".


Step
07
 sunrise20
Member since:
Mar 2011
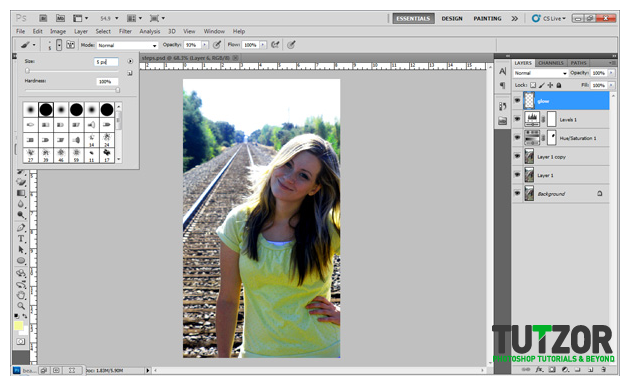
Before we begin with the pen tool we will need to set our brush presets. Set the size to 5px and set the hardness to 100%. And also set your foreground color to #f5f99b.

Step
08
 sunrise20
Member since:
Mar 2011
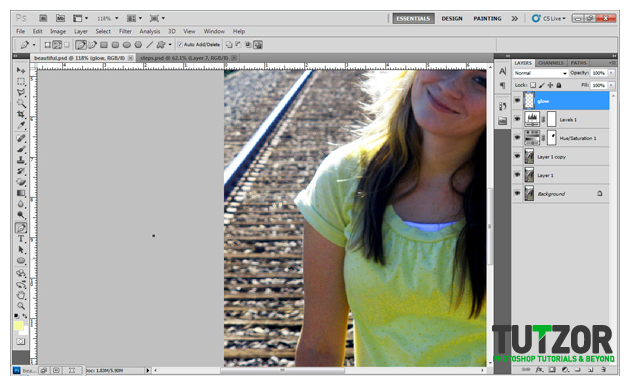
Now we can start to work with the awesome pen tool. We will make our first point to the left of the canvas. You will see a gray square when you click and release.

Step
09
 sunrise20
Member since:
Mar 2011
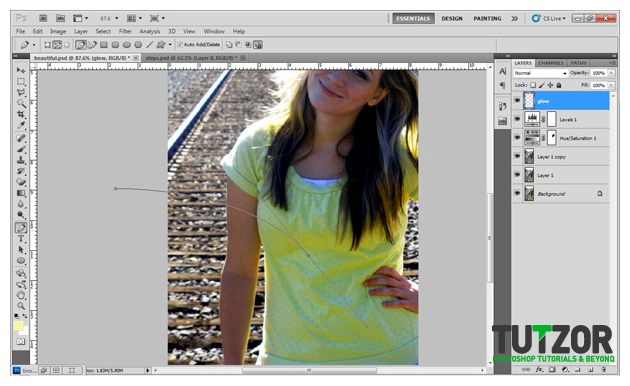
Once you have you first point, click somewhere in the center of the canvas and drag as far as you would like to bend the line.

Step
10
 sunrise20
Member since:
Mar 2011
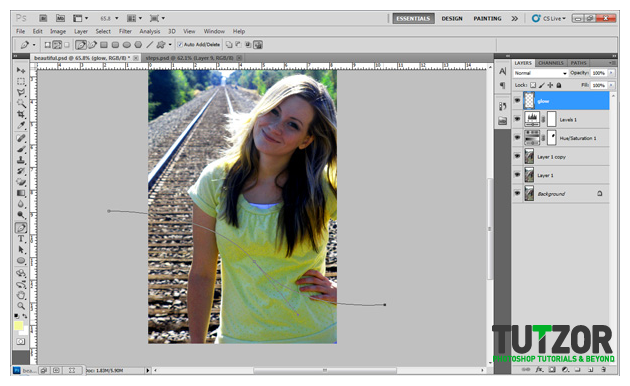
When you have your two points made to the way you like it, make a third point to the right of canvas. You should now have a nice curved line that runs across your canvas.

Step
11
 sunrise20
Member since:
Mar 2011
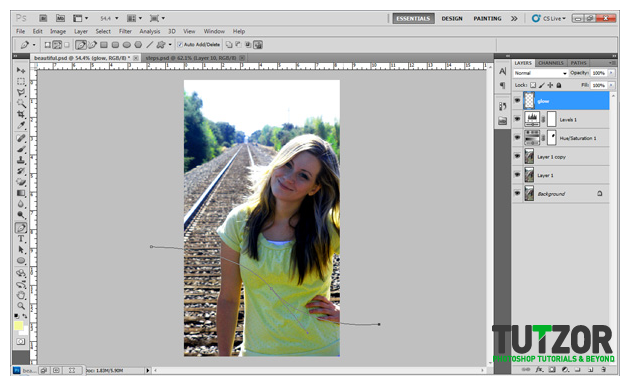
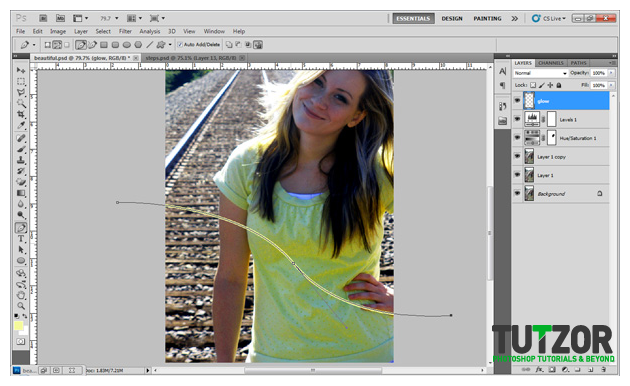
Now you should have 3 points that make up a path similar to this.

Step
12
 sunrise20
Member since:
Mar 2011
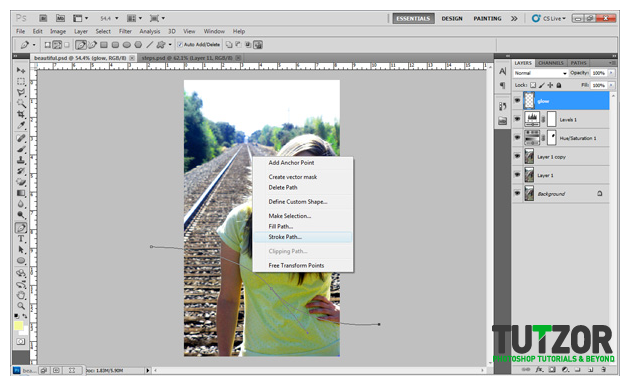
After making your line, with the pen tool still selected, right click in the center of your line on the canvas and select "stroke path" from the options

Step
13
 sunrise20
Member since:
Mar 2011
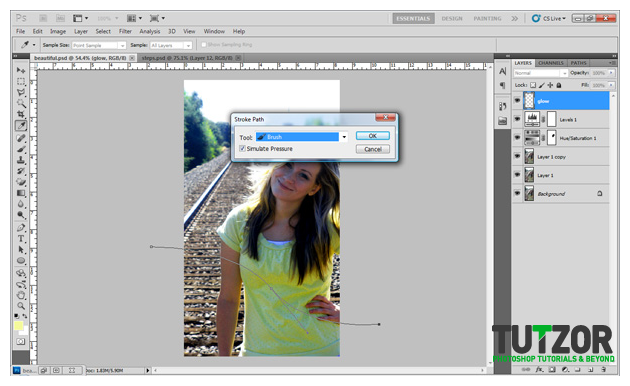
Select the "brush" option as your tool and check the box to stimulate pressure and press "OK". You should now see a thick yellowish line along your path.


Step
14
 sunrise20
Member since:
Mar 2011
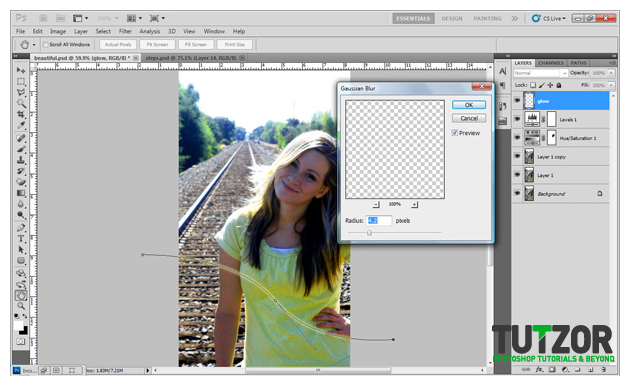
Now we want to blur our stroke a bit. In the top menu, go to Filter>Blur>Gaussian Blur and set your radius to about 4.2. Make sure your "Preview" box is checked so that you can see you results. Once you are happy with your results, press "Ok".

Step
15
 sunrise20
Member since:
Mar 2011
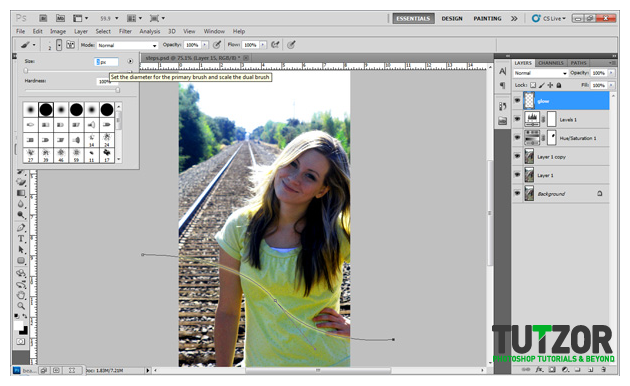
While still having the "glow" layer active, select your brush and set the size to 2px. Once you have done this, select your pen tool and set the foreground color to #fdfed4.

Step
16
 sunrise20
Member since:
Mar 2011
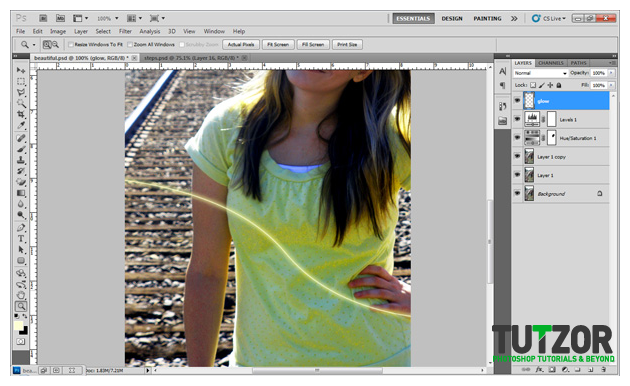
Once you have your pen tool selected, right-click on the canvas again and select "stroke path" and when the little window pops up, hit "Ok". To hide your path, press the "esc" key twice and you should now have a good looking stroke with a nice glow. (If you want to see your path, click the "PATHS" window next to the "LAYERS" and "CHANNELS" palettes and click on your path.)

Step
17
 sunrise20
Member since:
Mar 2011
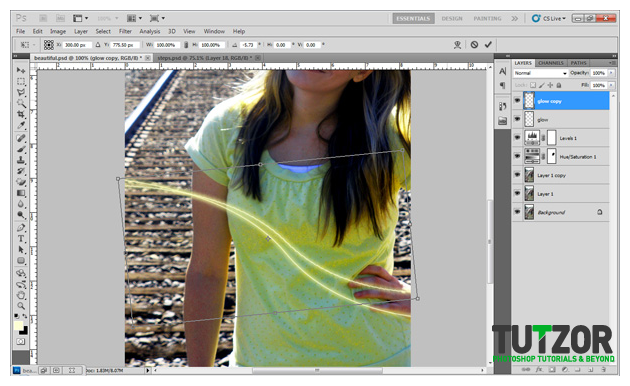
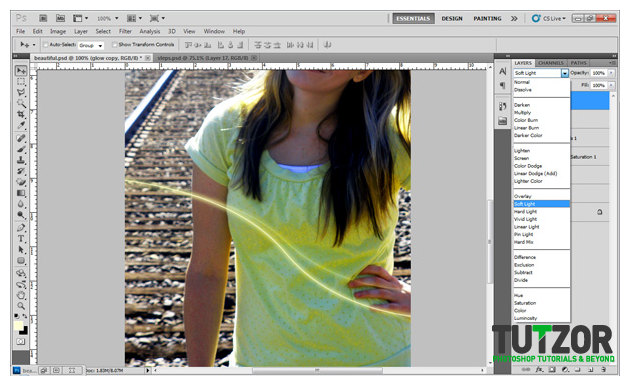
Duplicate your glow layer by pressing ctrl+J. Then we are going to use the "free transform" (ctrl+t on windows) method to rotate the layer counter clock-wise a tiny bit by clicking outside the boundary box and dragging. Once you have it rotated to your liking, holding shift and press the up key twice. This will move your layer up 20px. Then change the layer made from "Normal" to Soft Light".


Step
18
 sunrise20
Member since:
Mar 2011
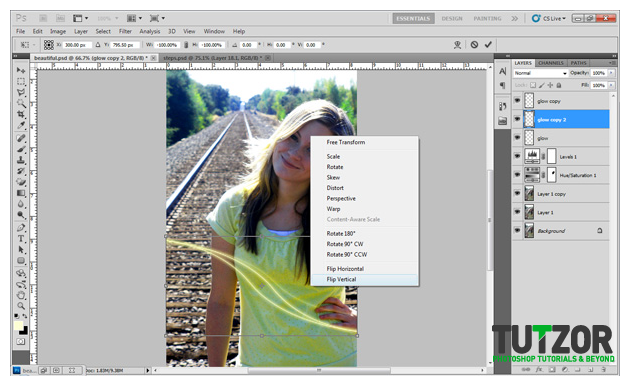
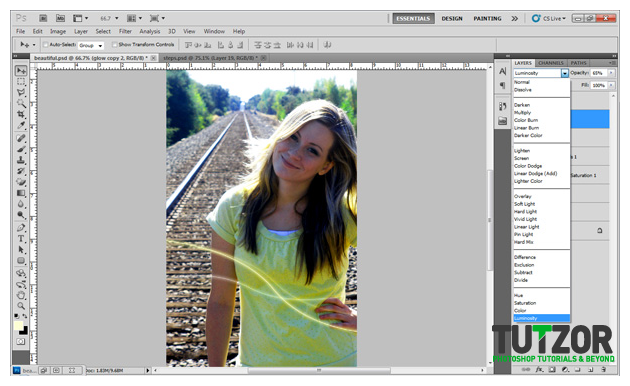
Next we are going to duplicate the "glow" layer again and by using the free transform method, right click and select "Flip Horizontal" and then right clicking again and select "Flip Vertical". Then rotate the layer clockwise to where you would like it and change the blending mode of your layer to "Luminosity" and bring down the opacity to 65%.


Step
19
 sunrise20
Member since:
Mar 2011
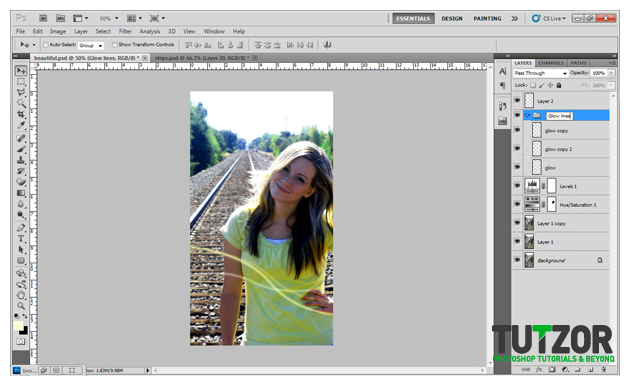
To keep the 3 glow lines together, lets group these 3 layers by selecting them and grouping them by going to Layer>Group Layers in the top menu or by pressing ctrl+G on windows. Then name this layer "Glow lines".

Step
20
 sunrise20
Member since:
Mar 2011
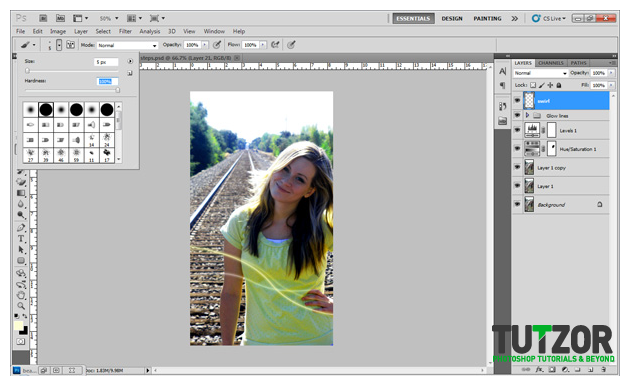
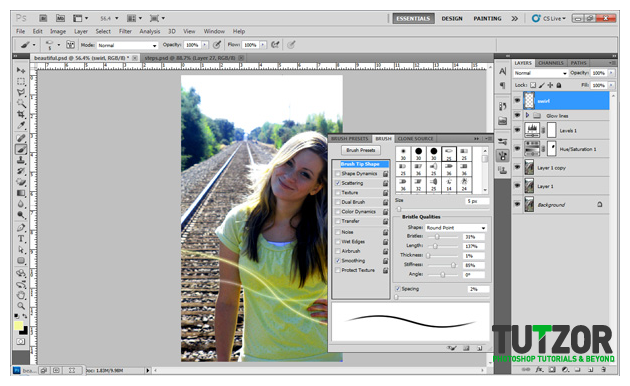
Now I want to add a glow line effect around her. I am going to use the pen tool again for this next step. First let’s add a new layer and call this layer "swirl" and change our brush size to 5px with the hardness at 100%. (In order to make this next step work, make sure that your press fades in and out. In order to know what I mean, look at the image I provided and see how the black line goes from thin, to thick and then back to thin. That is the type of brush you need. To review your brush presets, select the brush tool and there should be an icon at the top to enter the brush panel)


Step
21
 sunrise20
Member since:
Mar 2011
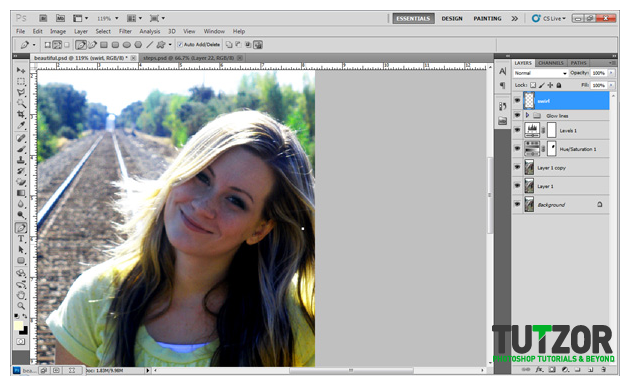
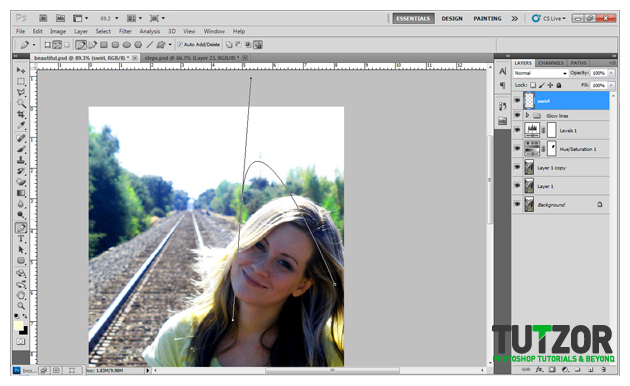
Next, by selecting our pen tool, make your first point somewhere in her hair in a place similar to mine.

Step
22
 sunrise20
Member since:
Mar 2011
Once you have your first point, make your next point to the right of her head (to the left of her from us) and once you click, drag your cursor downward in order to curve your path. It may take a few times to get it perfect for once you pop, the fund don't stop.

Step
23
 sunrise20
Member since:
Mar 2011
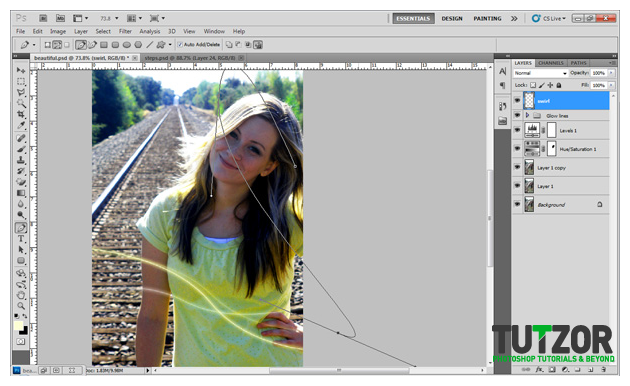
We are going to make our third point off the canvas to the right. Click to make your point and drag to make a nice curve.

Step
24
 sunrise20
Member since:
Mar 2011
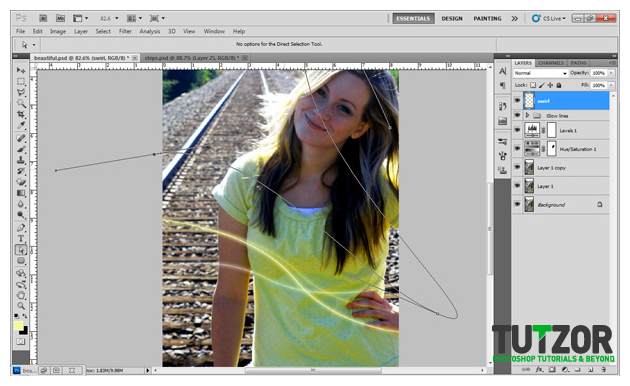
Then we are going to make our fourth point. Click to the left of the canvas and drag to make your last nice looking curve.

Step
25
 sunrise20
Member since:
Mar 2011
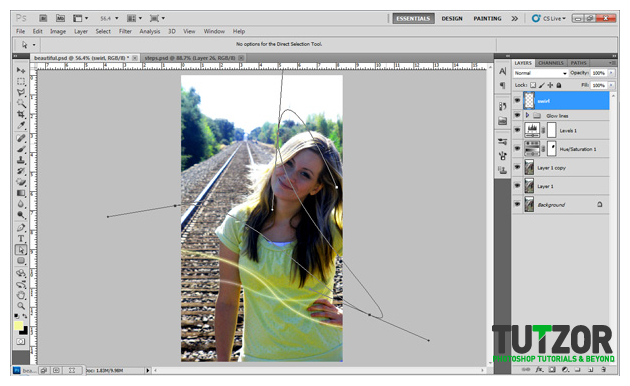
You should now have something like this!




Comments
Re: Simple light effect to your everyday photo
Very cute, I do a lot of photo processing of modern day shots, and often people ask for simple enhancements. I shall be adding this to my repertoire!
S