

 cosmin
Hi there,
I'll show you how to divide an image into a group of Polaroid photographs. You can use the image I took or your own.
Also I used this pattern texture but i changed a bit for you, so download it from the Required Files
http://www.flickr.com/photos/calebkimbrough/3672774015/sizes/o/in/photos...
Enjoy!
 cosmin
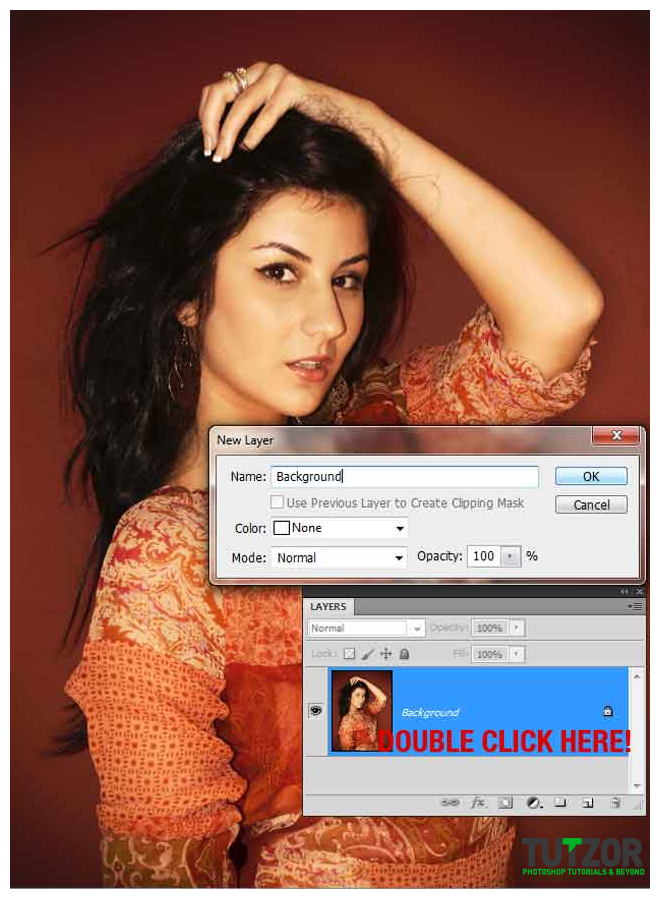 cosmin
 cosmin
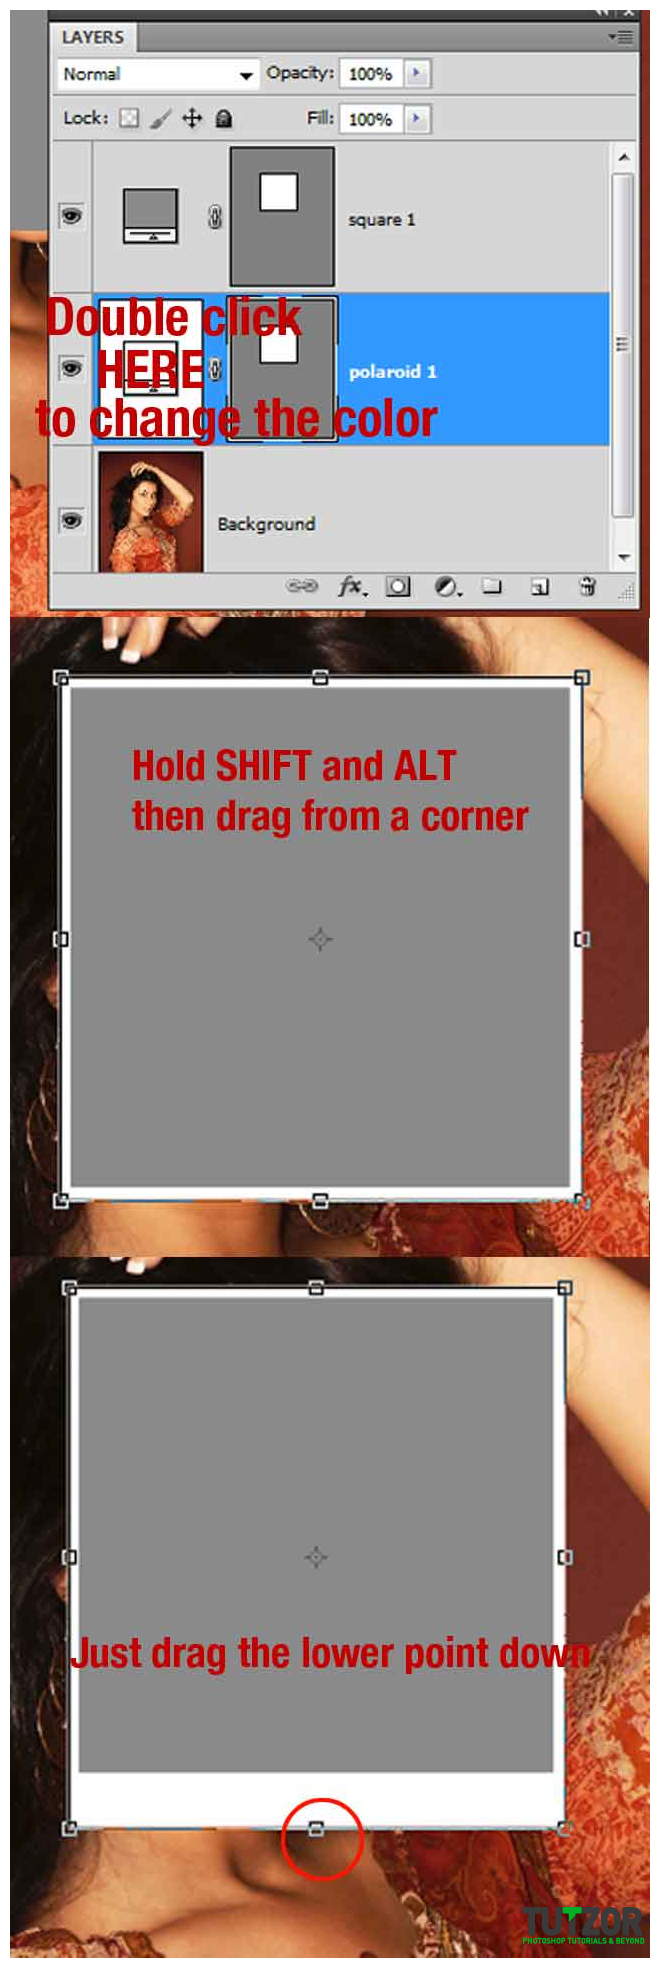 cosmin
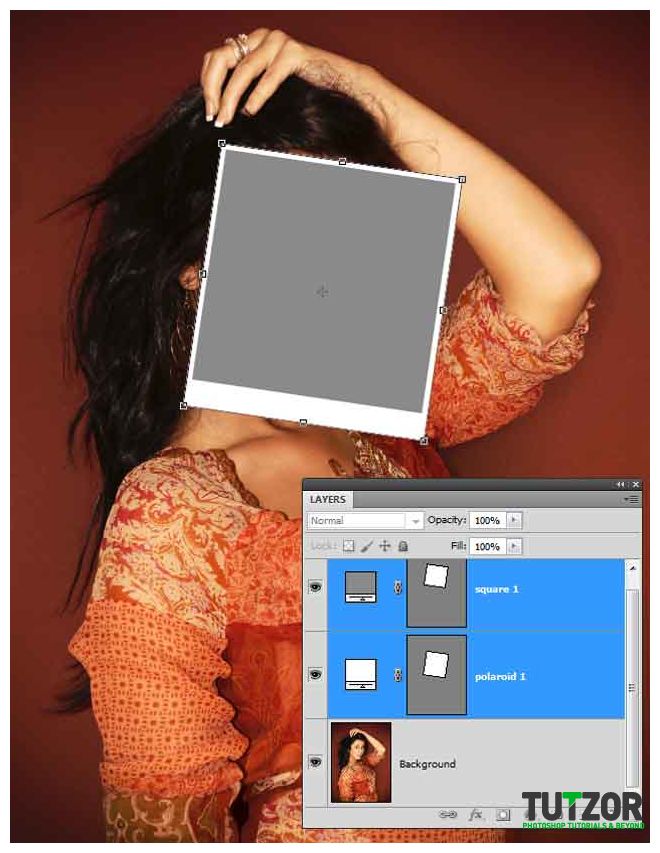 cosmin
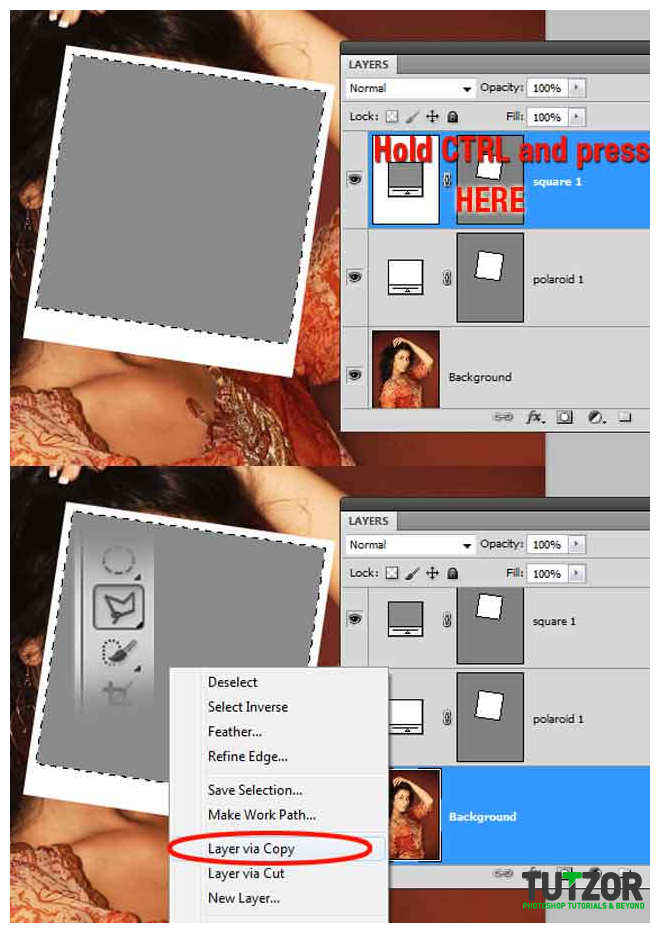 cosmin
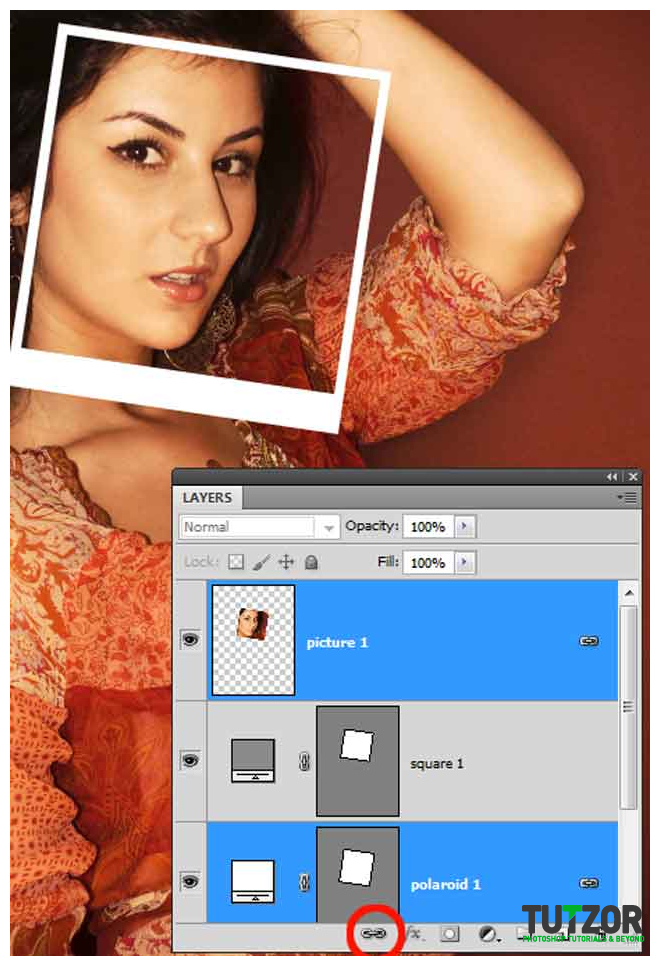 cosmin
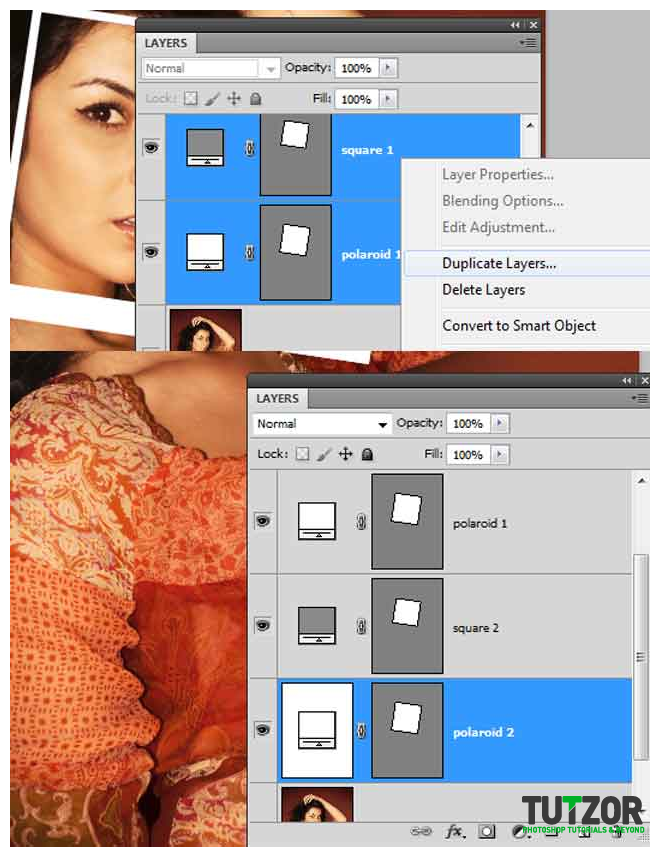 cosmin
 cosmin
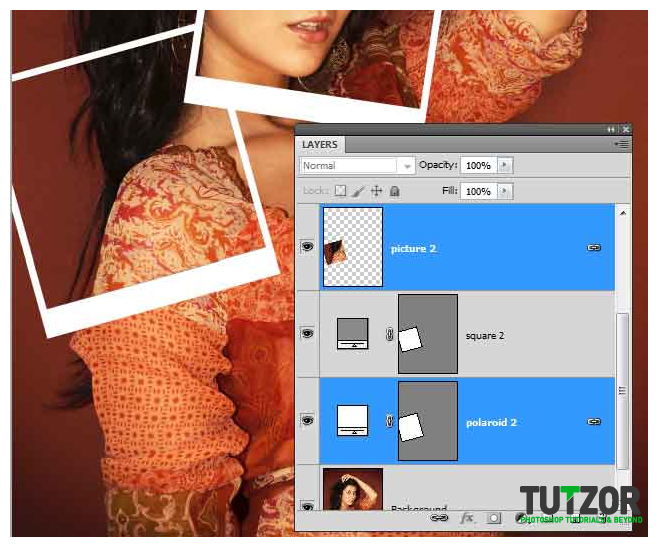 cosmin
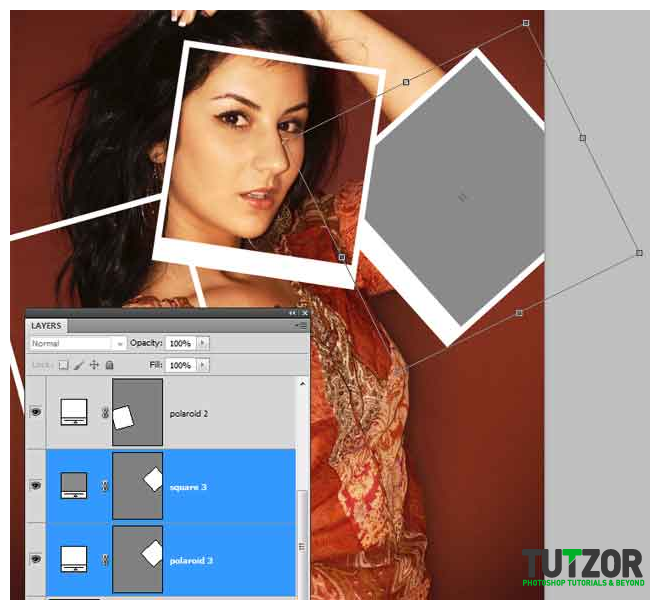 cosmin
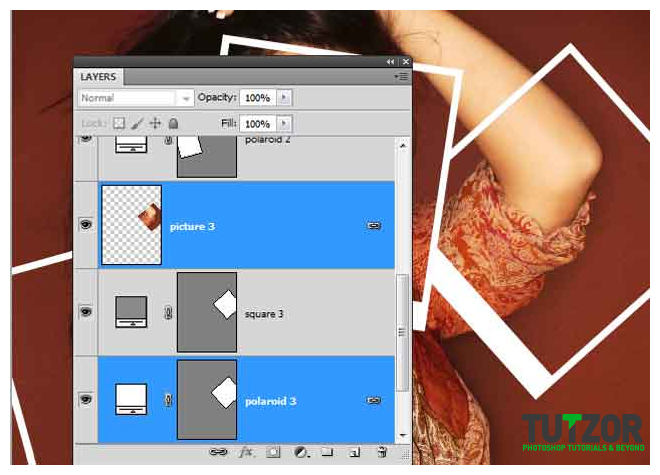 cosmin
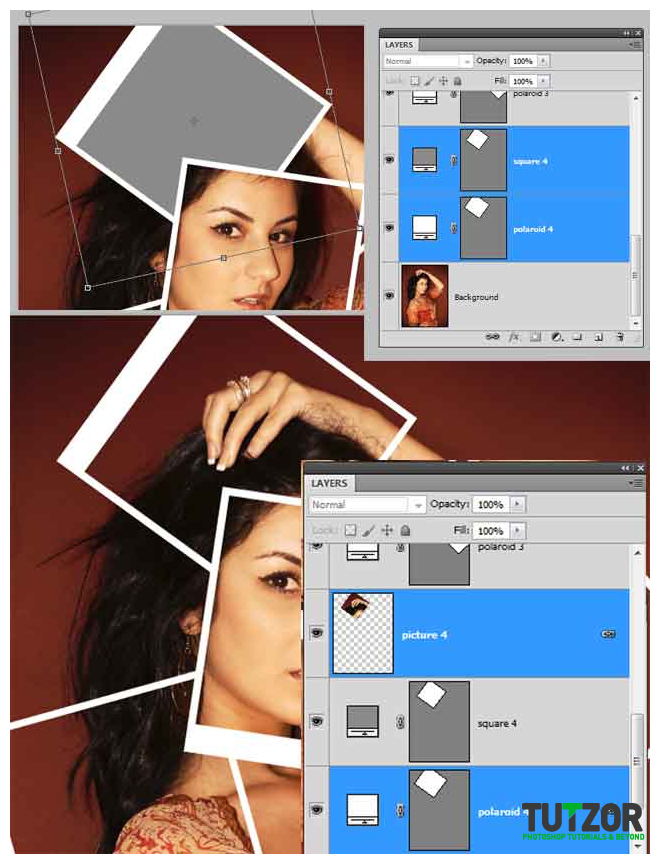 cosmin
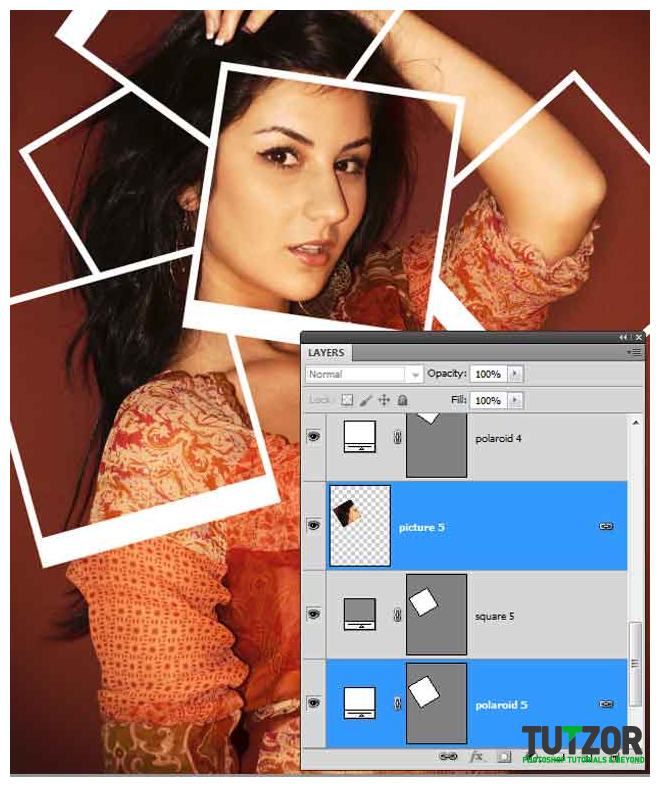 cosmin
 cosmin
 cosmin
 cosmin
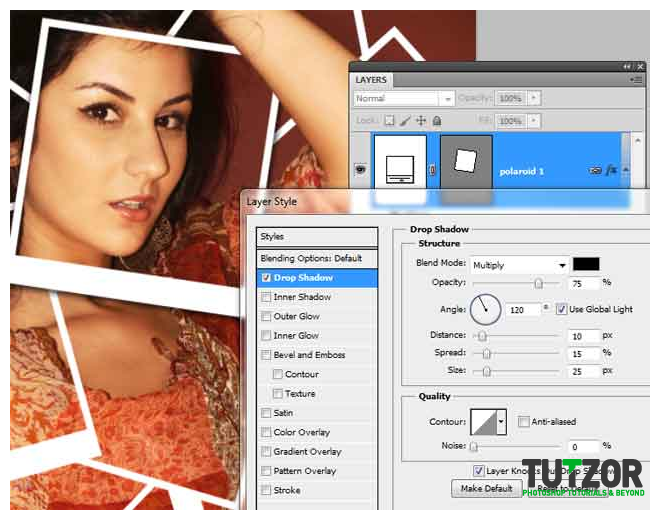 cosmin
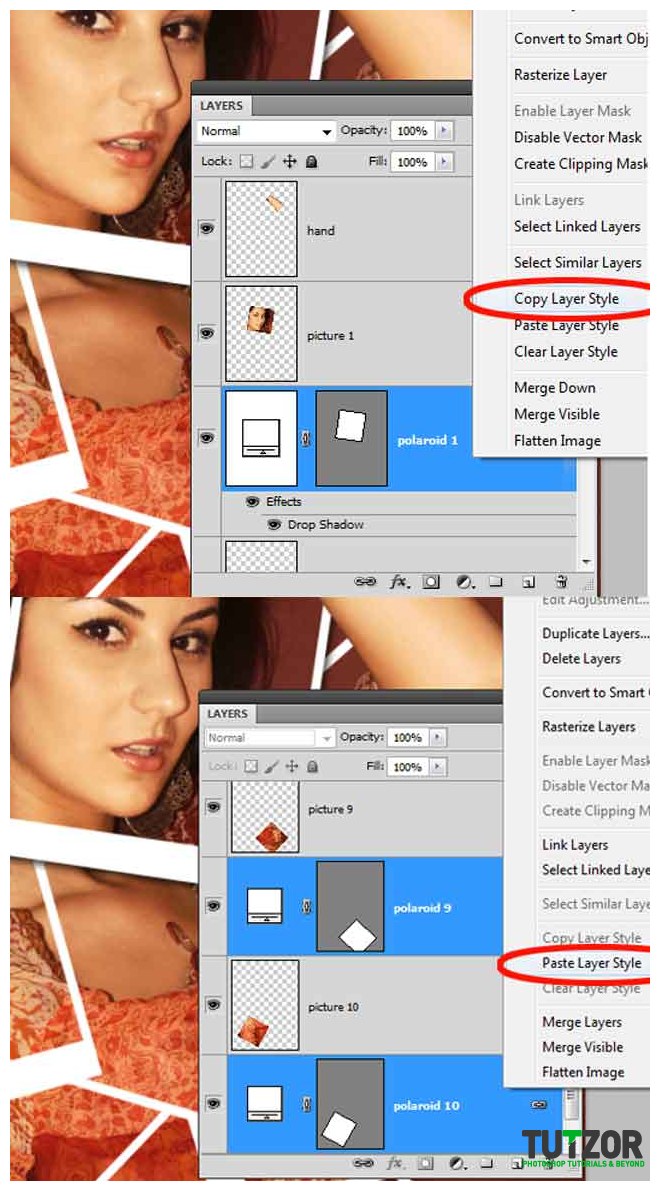 cosmin
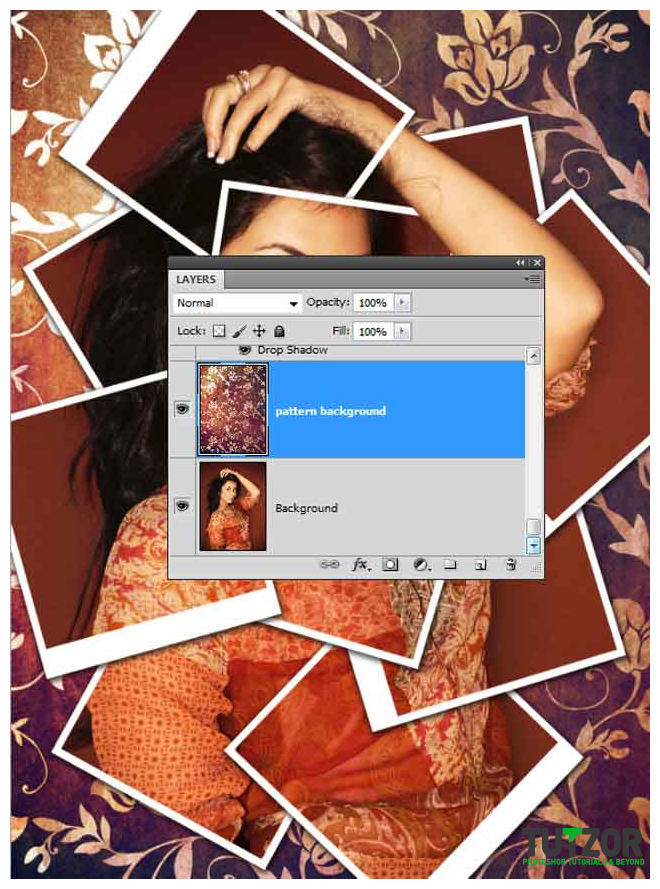
Copyright© 2012 Tutzor All Rights Reserved | Developed by: Iceous Design


Comments
Re: How to split an image into Polaroid photos
Great tutorial thanks - I'm going to give this a go.
Re: How to split an image into Polaroid photos
you can select both layers by hitting shift+control/command+click on the layer panel.
Re: How to split an image into Polaroid photos
just awesome................. thanks for sharing such a great tutorial.:)
Thanks A LOT!
Man, I really appreciate the effort to make this post possible and obviously the way you teach the technique. Thanks. I learn A LOT!
Re: How to split an image into Polaroid photos
can u upload the video of this.. i find it very difficult.. the layer thing.. how do i create the link between the layers.. byw m using cs4
Re: How to split an image into Polaroid photos
how to select two layer as you said selec "square1" and "polaroid1"
Re: How to split an image into Polaroid photos
hell ye ,
ma man .
wowowowowowowowowowowowo
Re: How to split an image into Polaroid photos
wow, this is fantastic. thanks.
Re: How to split an image into Polaroid photos
i cant able to find the layer via copy what to do boss...
Re: How to split an image into Polaroid photos
Fantastic tutorial , very clear ! thanks mate :)
Re: How to split an image into Polaroid photos
i've read this tutor before but i dont undestand yet..
but now i got it
Re: How to split an image into Polaroid photos
I feel powerfully about it and love learning more on this subject. A great tutorial with a great final result! Keep up the good work.
http://www.think360studio.com/
Re: How to split an image into Polaroid photos
thumbs UP :)
Keep share...
Re: How to split an image into Polaroid photos
thank you.realy very usefull lesson for me.
www.photoshopcu.net
Re: How to split an image into Polaroid photos
Nice! Is some one having hair masking you have take our service http://www.metrodesk.com.bd to do this type of design.
Thanks
Re: How to split an image into Polaroid photos
muy buen tutorial, con esto aprendi a usar unas cosas mas... y otra vez mas, esta muy bien el tuto... saludos
COOL Tutorial
COOL!